ESXi – Run Multiple VMs on a Single Physical Server
ESXi is VMware’s lightweight operating system that runs directly on server hardware and helps you run multiple virtual machines on a single physical server. Save money, optimize resources, and build a safer infrastructure.

What Is ESXi?
ESXi helps you get multiple workloads onto fewer physical machines, reducing hardware costs, data center space, and power consumption.
Run Multiple VMs Without Messing Anything Up
It gives you multiple VMs, so each VM is isolated from the other, which means you can easily run Windows, Linux, and different application versions on the same hardware without messing up anything. If one VM crashes, the others will continue to run fine.
With ESXi, you can easily clone, move, create, and delete VMs in minutes.
Save Money and Manage Tasks Easily
Organisations with many servers save money with systems like ESXi and reduce hardware, manage tasks easily and have better resource utilization.
ESXi also integrates with VMware’s broader ecosystem like vSphere and vCenter to offer features like live migration like moving running VMs between hosts with zero downtime, automated failure, and simplified backup and restore.
Thin Provisioning
Allocate storage space dynamically as needed, reducing waste and improving efficiency.
Network Virtualization
Create flexible virtual networks that adapt to your infrastructure needs.
Storage Management
Advanced storage controls for better data organization and performance.
Performance Monitoring
Real-time insights into your virtual environment’s health and performance.
Backup Integration
Seamless backup solutions to protect your virtual machines and data.
API Automation
Automate repetitive tasks and integrate with your existing tools.
ESXi Features In Detail
VM Creation and Management
ESXi helps you create virtual machines that act like completely independent computers. You can easily install any operating system, like Windows servers, Linux distributions, or even older legacy models, all running individually on the same hardware. Every VM gets its own CPU cores, storage, and memory, which you can adjust on the fly without rebooting. It makes it quite easy and hassle-free to run different workloads side by side.
Snapshot and Cloning
Before making risky changes like a software update or configuration modifications you can simply take a snapshot like freezing the VM’s current state. If something breaks you can easily roll back to the snapshot in seconds. Cloning gives you the ability to make copies of VMs instantly which is perfect for creating a test environment or quickly installing identical servers.
Resource Pooling and Allocation
ESXi shares the physical server’s resources among all your VMs. You can set minimum to maximum limits, priorities, and reservations for CPU, memory, and storage. If one VM isn’t using all its allocated resources ESXi can redistribute them to VMs that need more power at that moment with efficient utilization without manual intervention.
Live Migration (vMotion)
You can easily move a running VM from one physical server to another with zero downtime. The VM keeps running, users stay connected, and still wouldn’t notice anything. It is so useful for hardware maintenance and you can also empty a server of all its VMs, perform upgrades and then move everything back without any service interruptions.
High Availability and Fault Tolerance
If a physical server fails, ESXi can restart automatically all the VMs that were running on it on other servers that are healthy. When you enable Fault Tolerance, critical VMs can run in perfect sync on two servers at the same time and the other continues without delay.
Security and Isolation
Each VM is isolated from the other at the hardware level. Even if a VM gets compromised by malware or crashes it can’t affect others on the same host. ESXi also has in built firewall capabilities, secure boot features and encrypted vMotion to protect your virtual infrastructure.
How to Download VMware ESXi
Follow these simple steps to download ESXi safely from the official Broadcom support portal.
⚠️ To save any type of errors & viruses, we recommend downloading ESXi from support.broadcom.com and not any third party site as it can be dangerous.
1Register at Broadcom
Open and register at support.broadcom.com to access the VMware downloads.

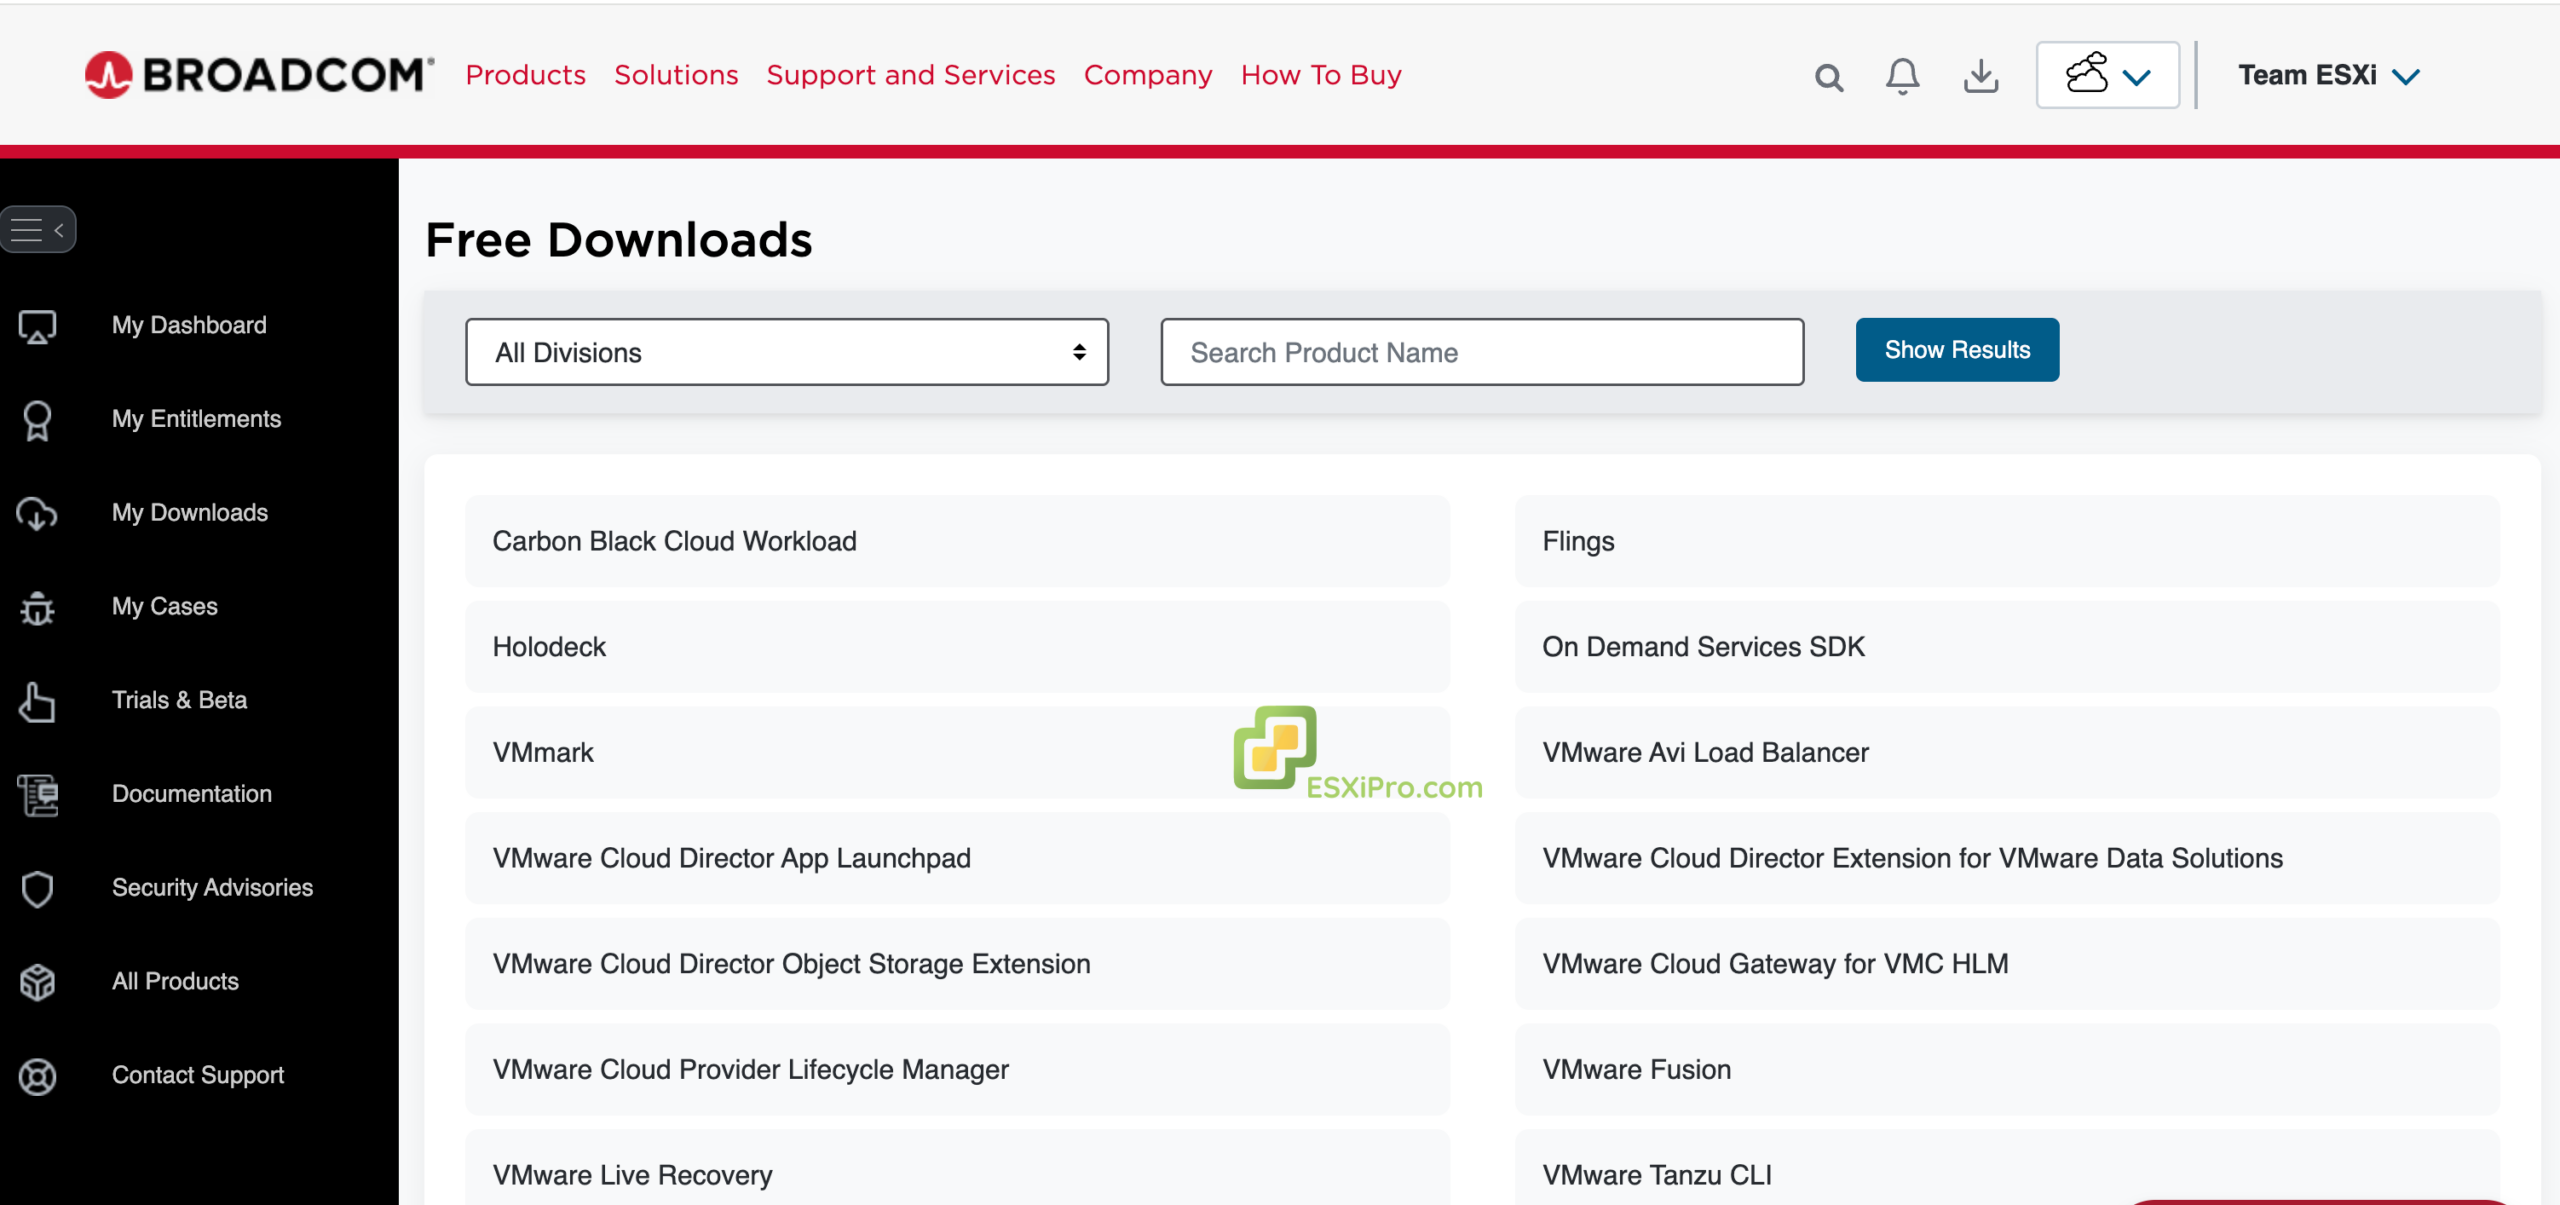
2Access Latest Version
Click below to access the latest VMware vCenter Server version (we’ve already selected it for you).
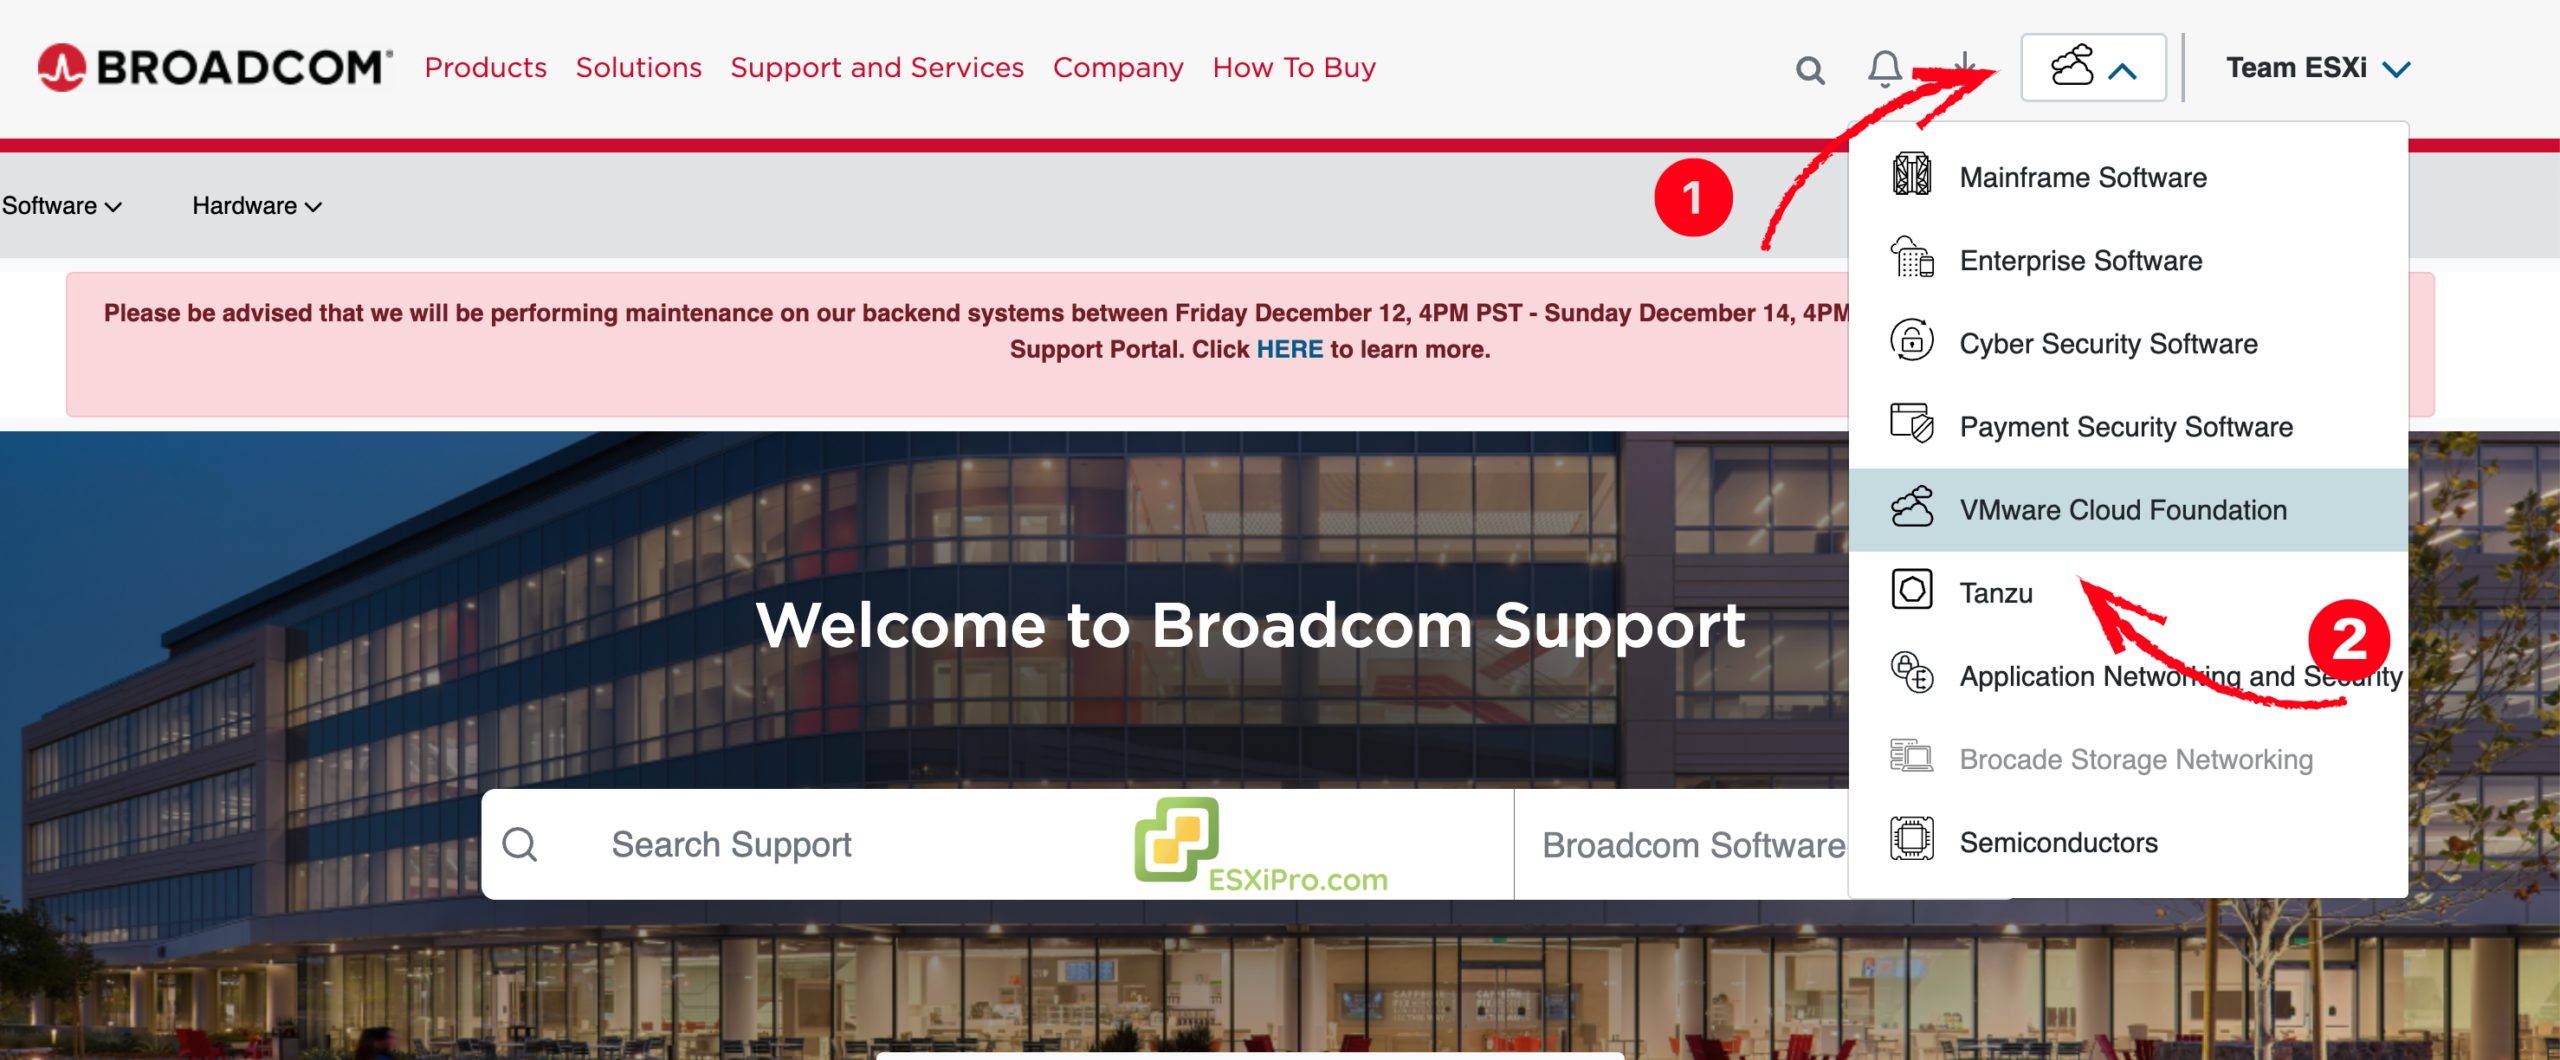
Go to Download Page →3Select VMware Cloud Foundation
Select the VMware Cloud Foundation from the available options.
4Find VMware vCenter Server
In the server list, find “VMware vCenter Server” and select it.
5View Latest Versions
This will take you to the latest available versions.
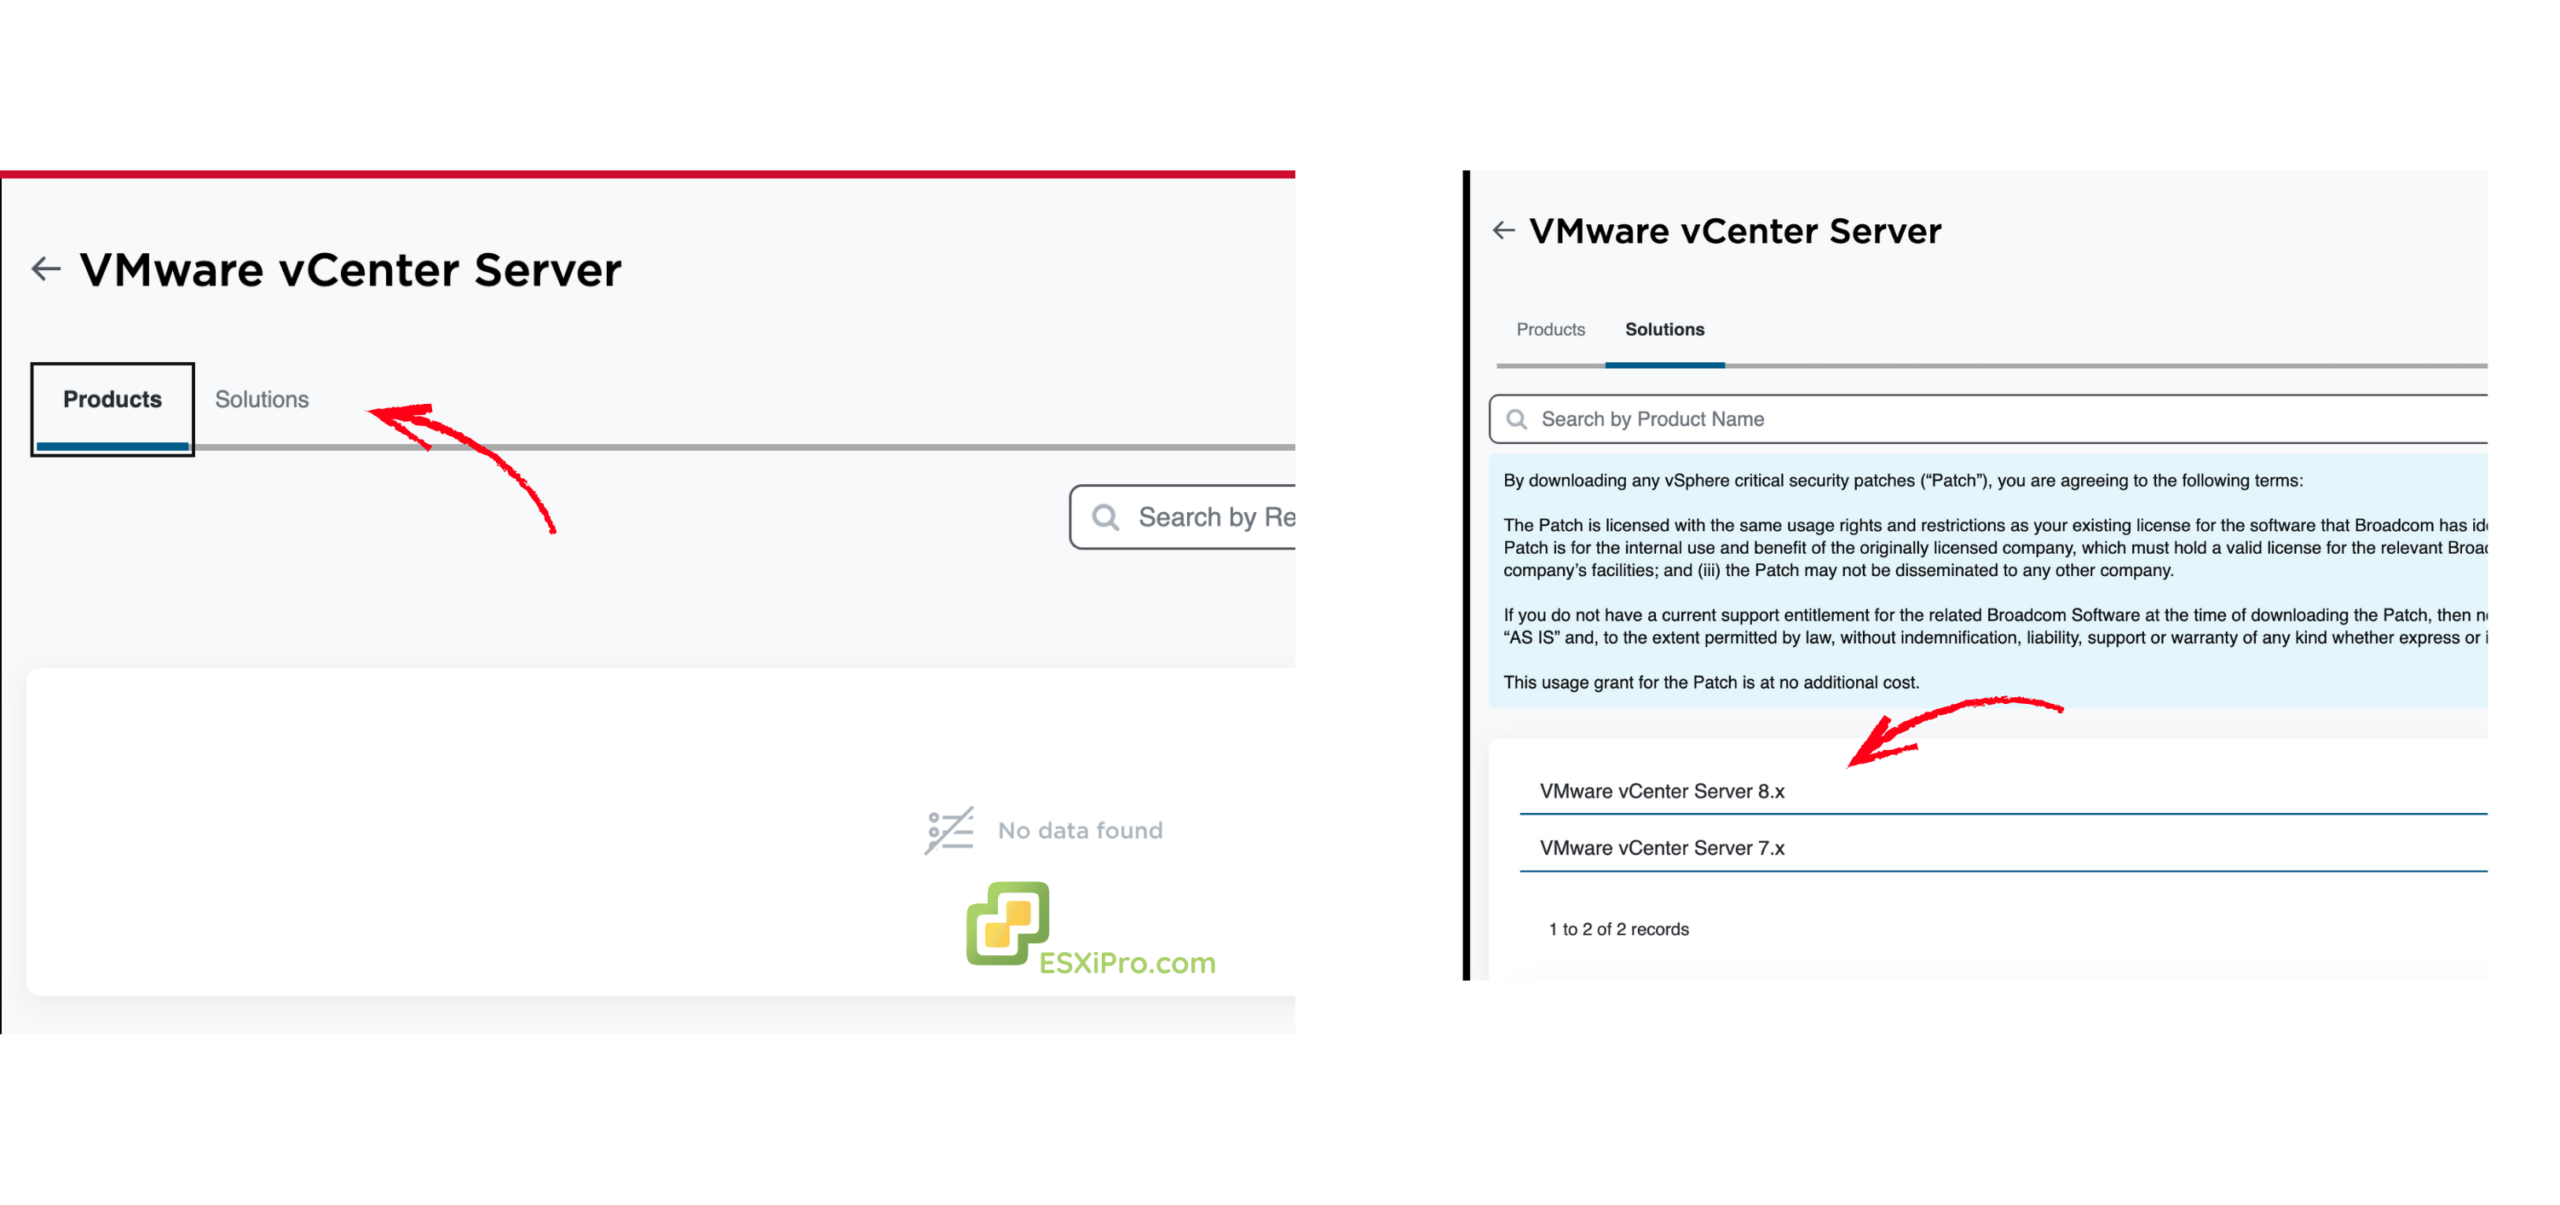
6Select Version
Select any version. For now, we’ve selected the VC-70 version.
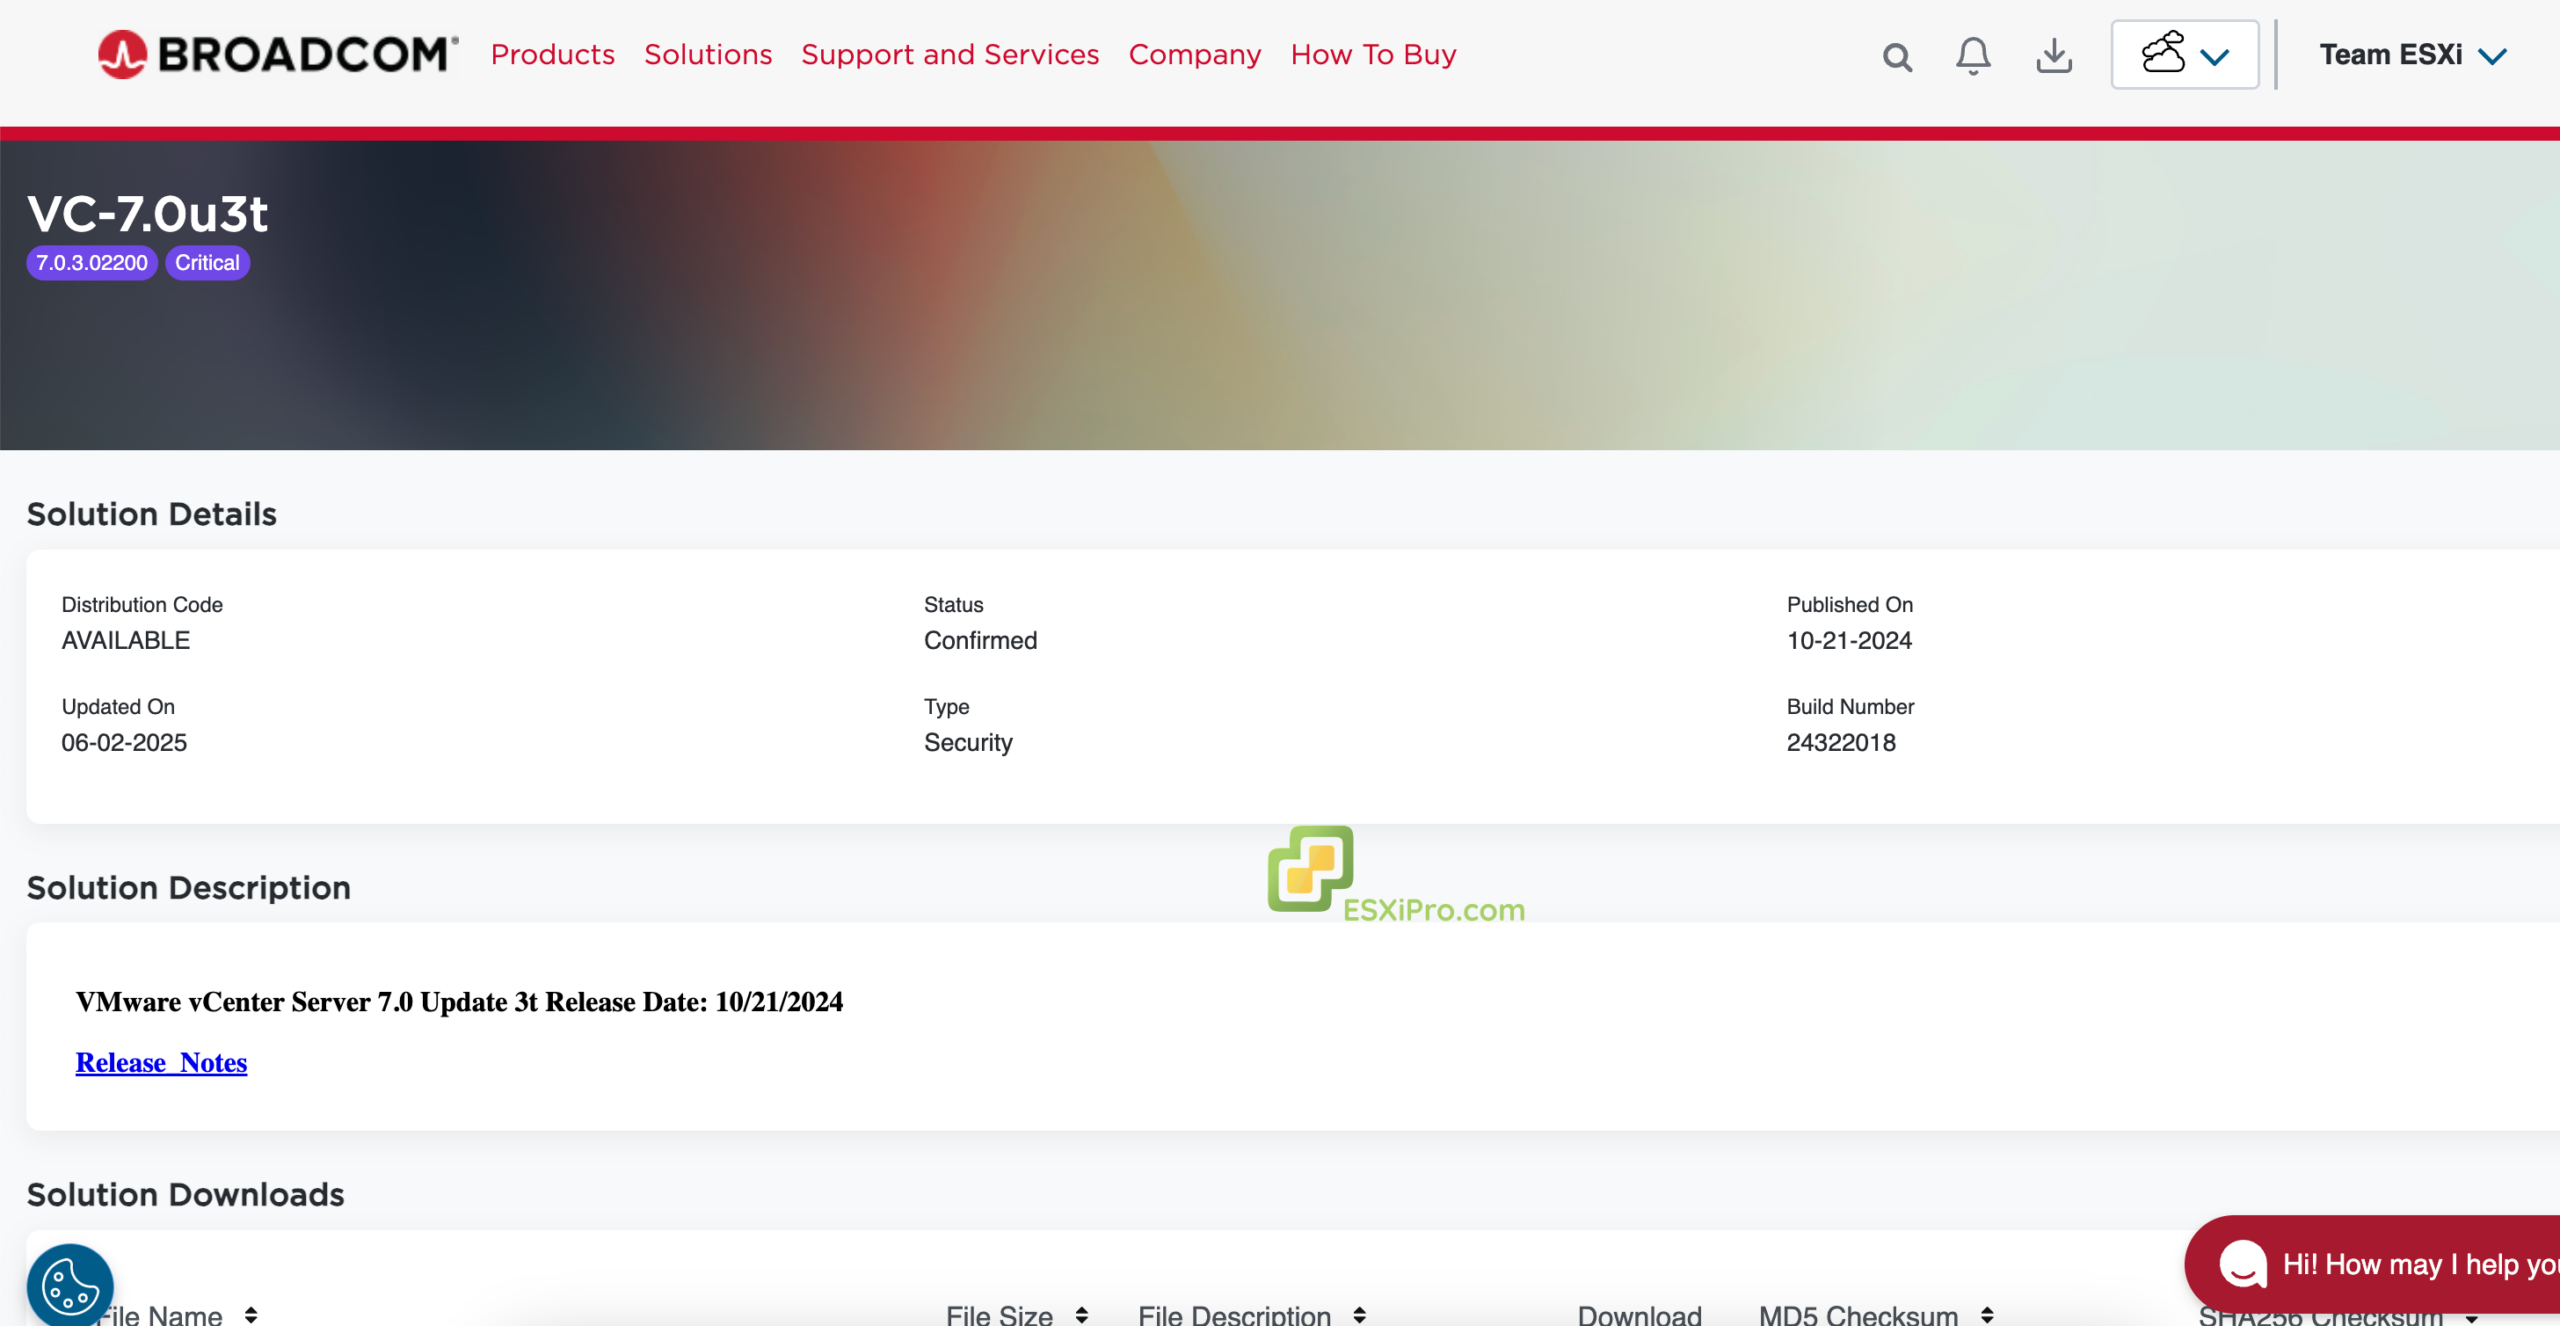
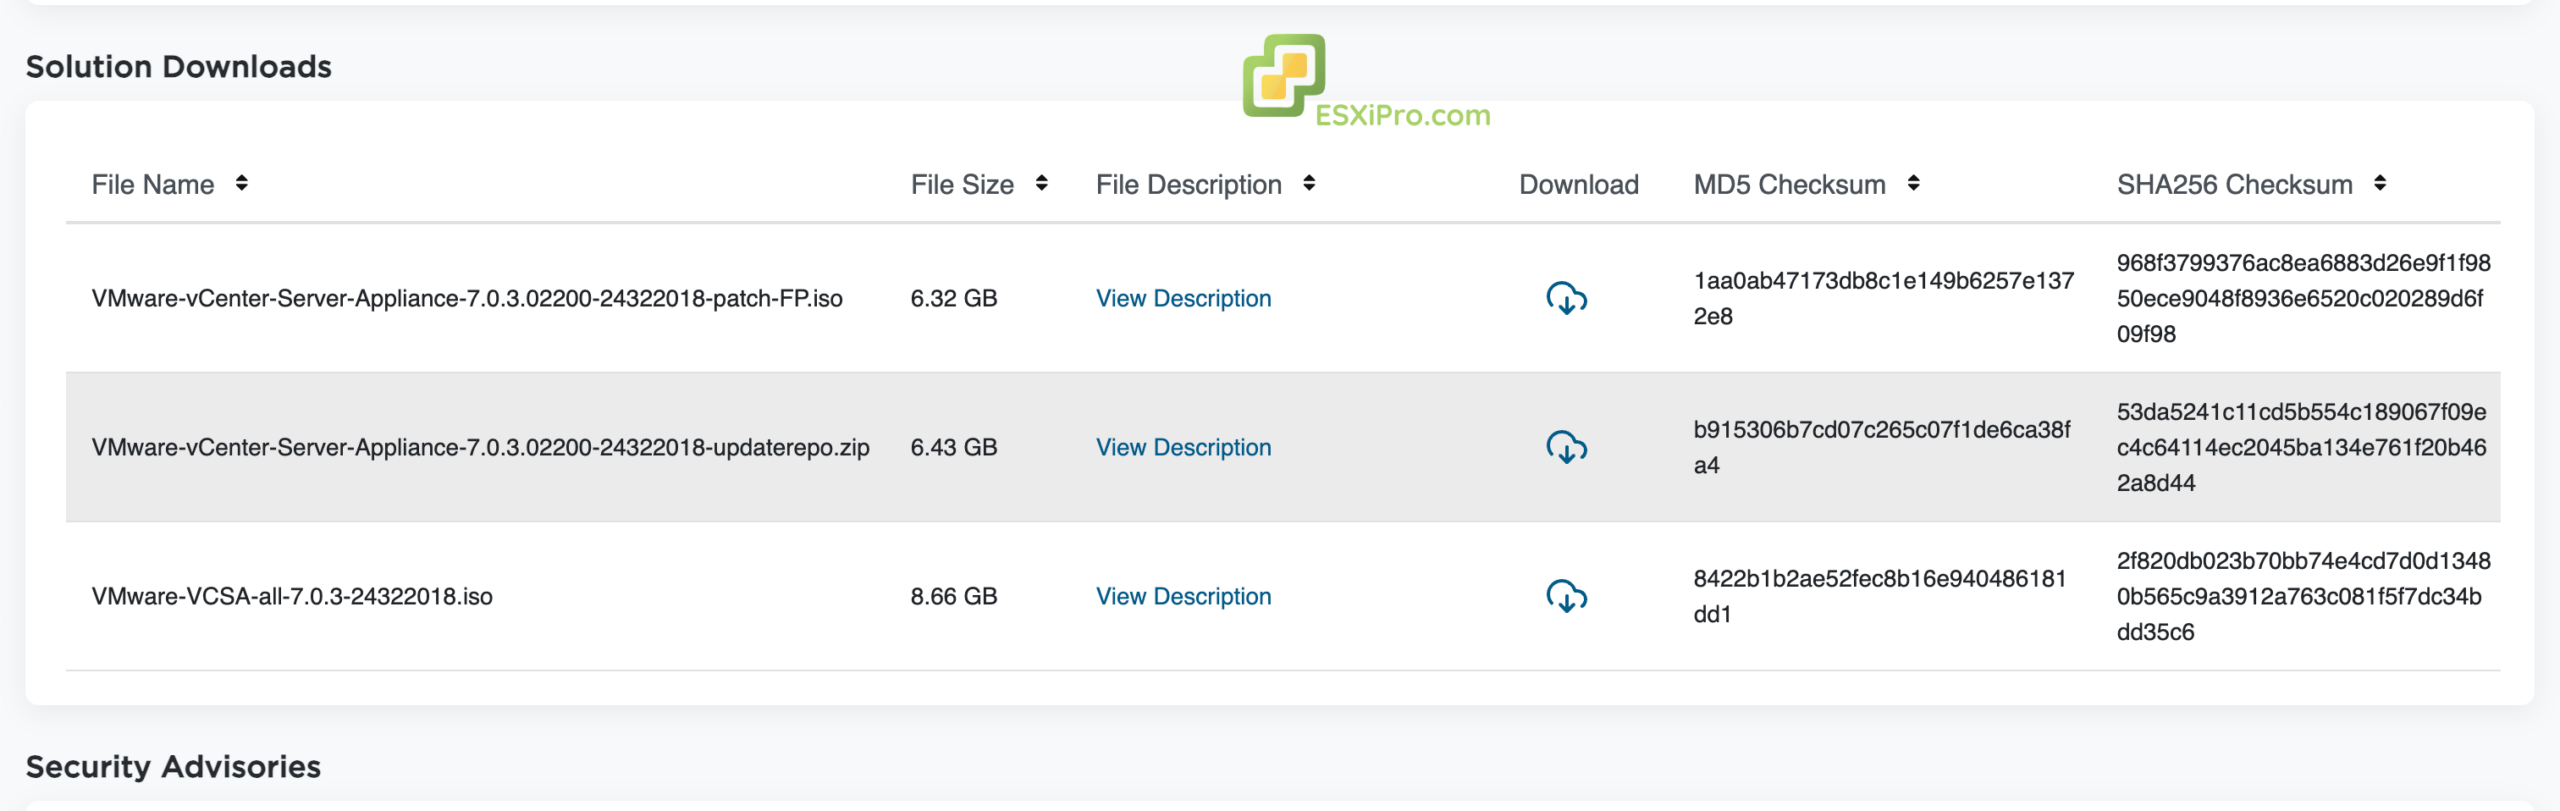
7Find Published Solution
On the same page, you’ll find the published final solution.
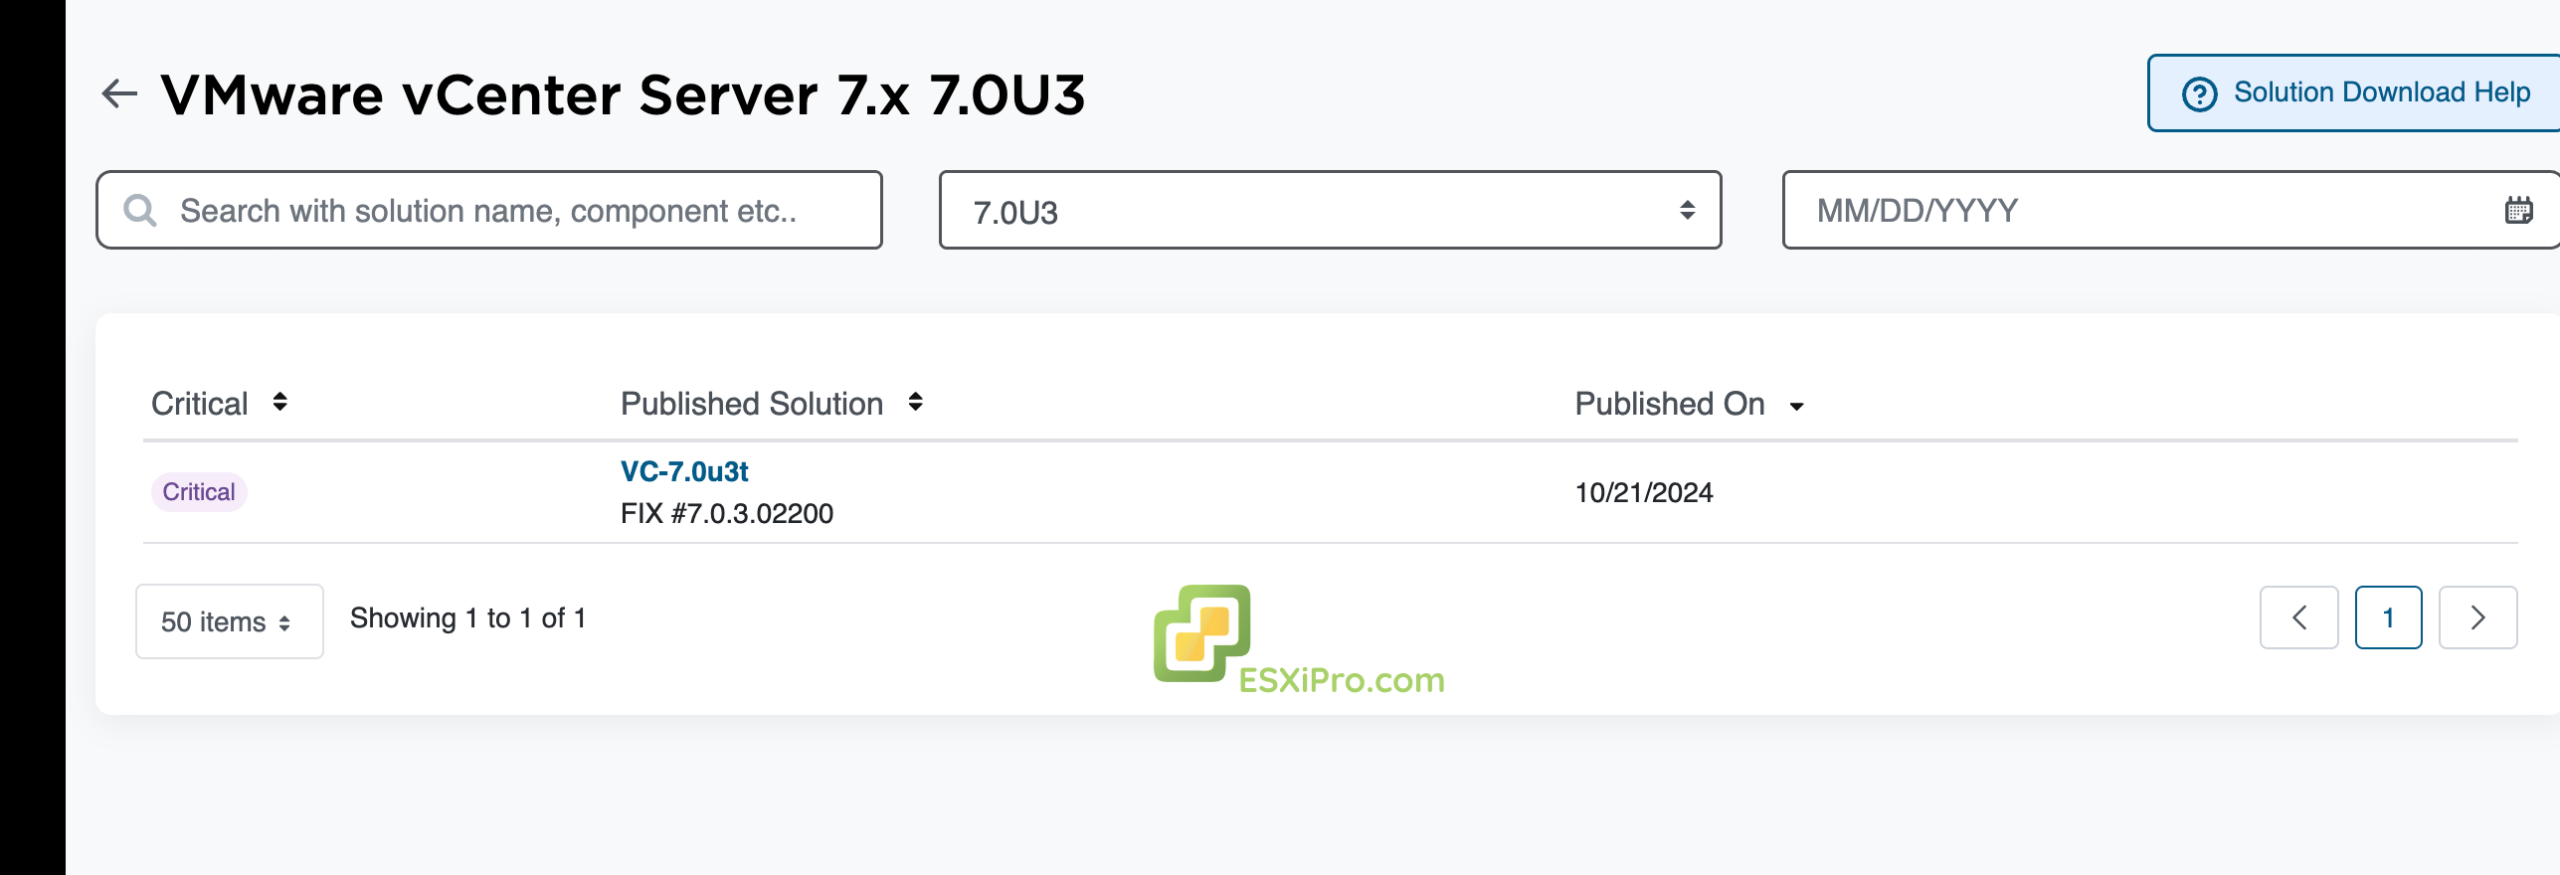
8Download ISO File
Click on the published version name and download the ISO file from there.
How to Install VMware ESXi
Complete installation guide from creating bootable media to accessing the web interface.
Requirements Before Installation
- Server with supported hardware configuration
- USB flash drive with at least 8GB
- Monitor and keyboard for installation
- ESXi ISO file downloaded from Broadcom
- Rufus or similar tool to create bootable USB
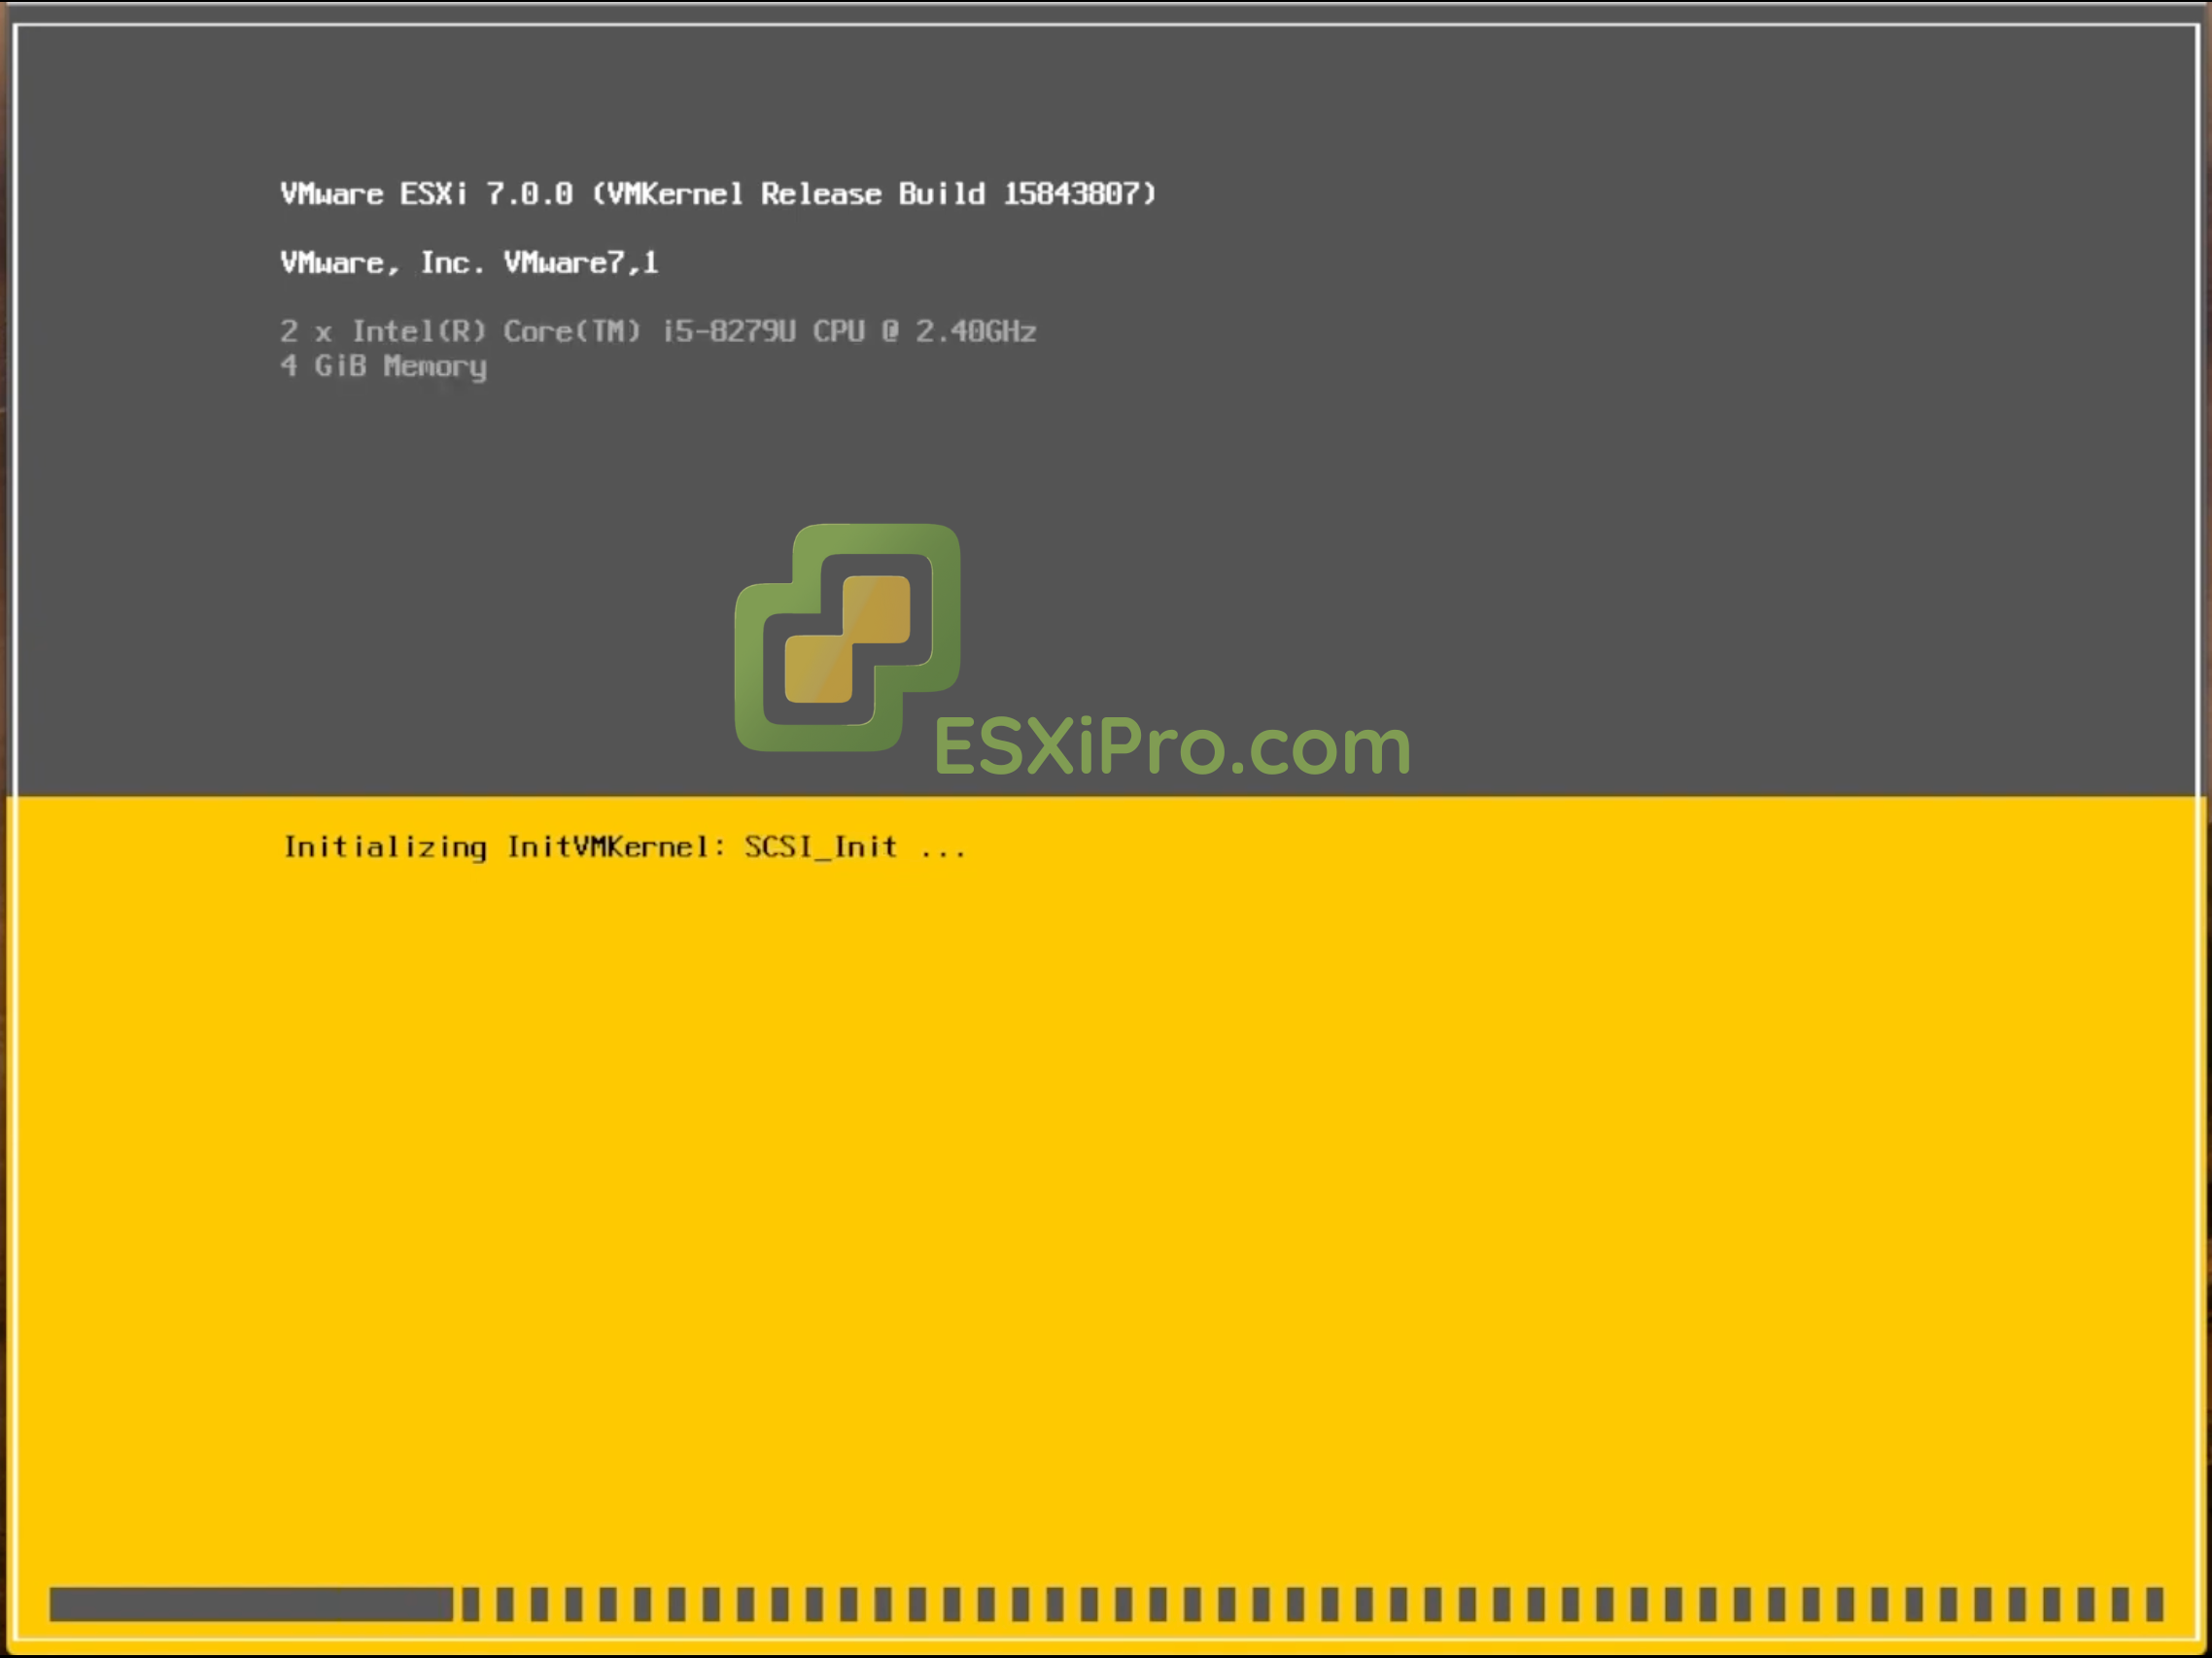
1Start The Installer
Insert your bootable media into the server and boot from it. The installer will run automatically and load off necessary files.
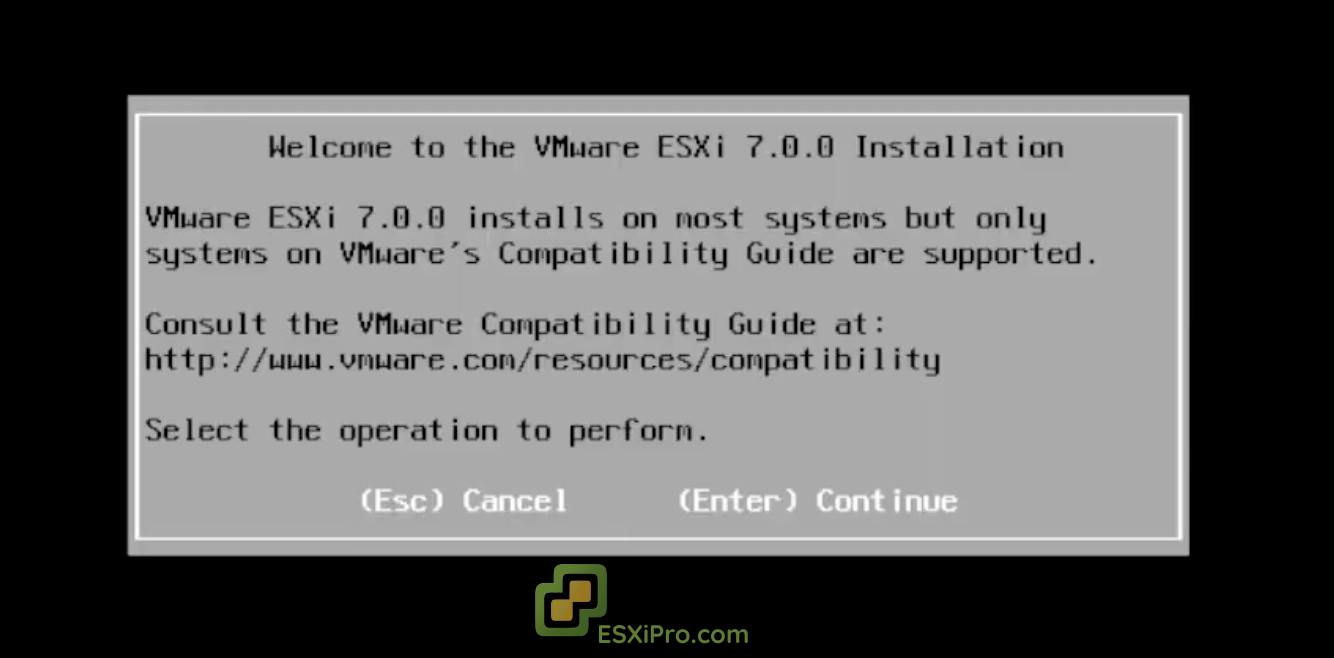
2Welcome and EULA
When the welcome screen appears, press Enter to continue then press F11 to accept the license agreement EULA.
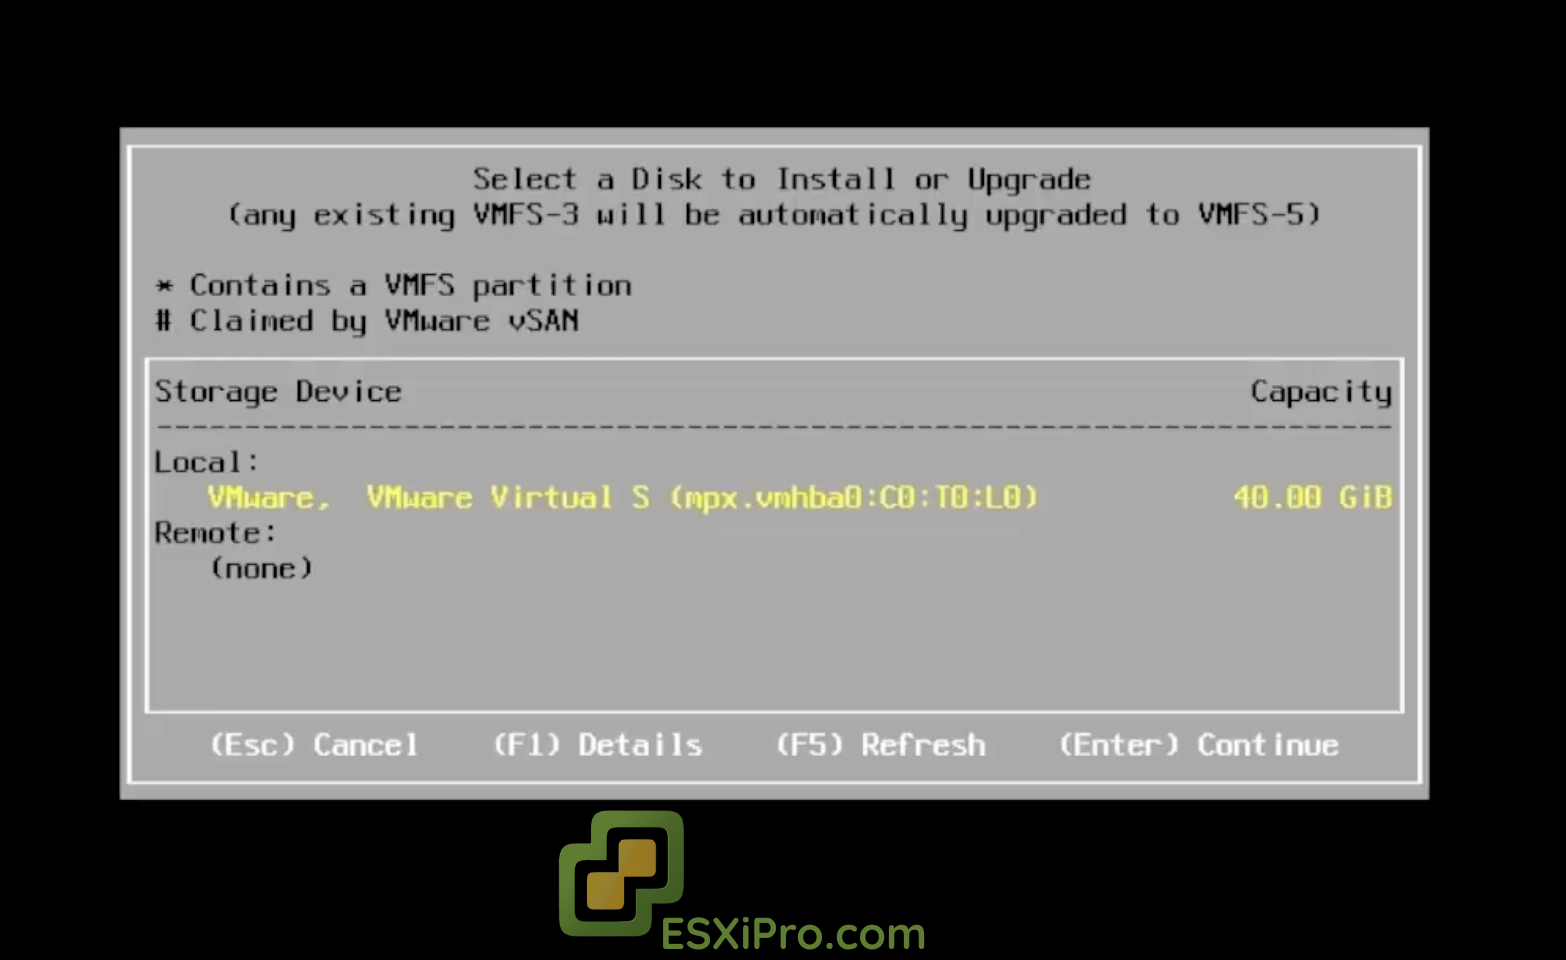
3Select Disk
The installer will search for available storage devices, so select the hard drive where you want to install ESXi and press Enter.
Note: Selecting a disk will format and delete the existing data on that drive.
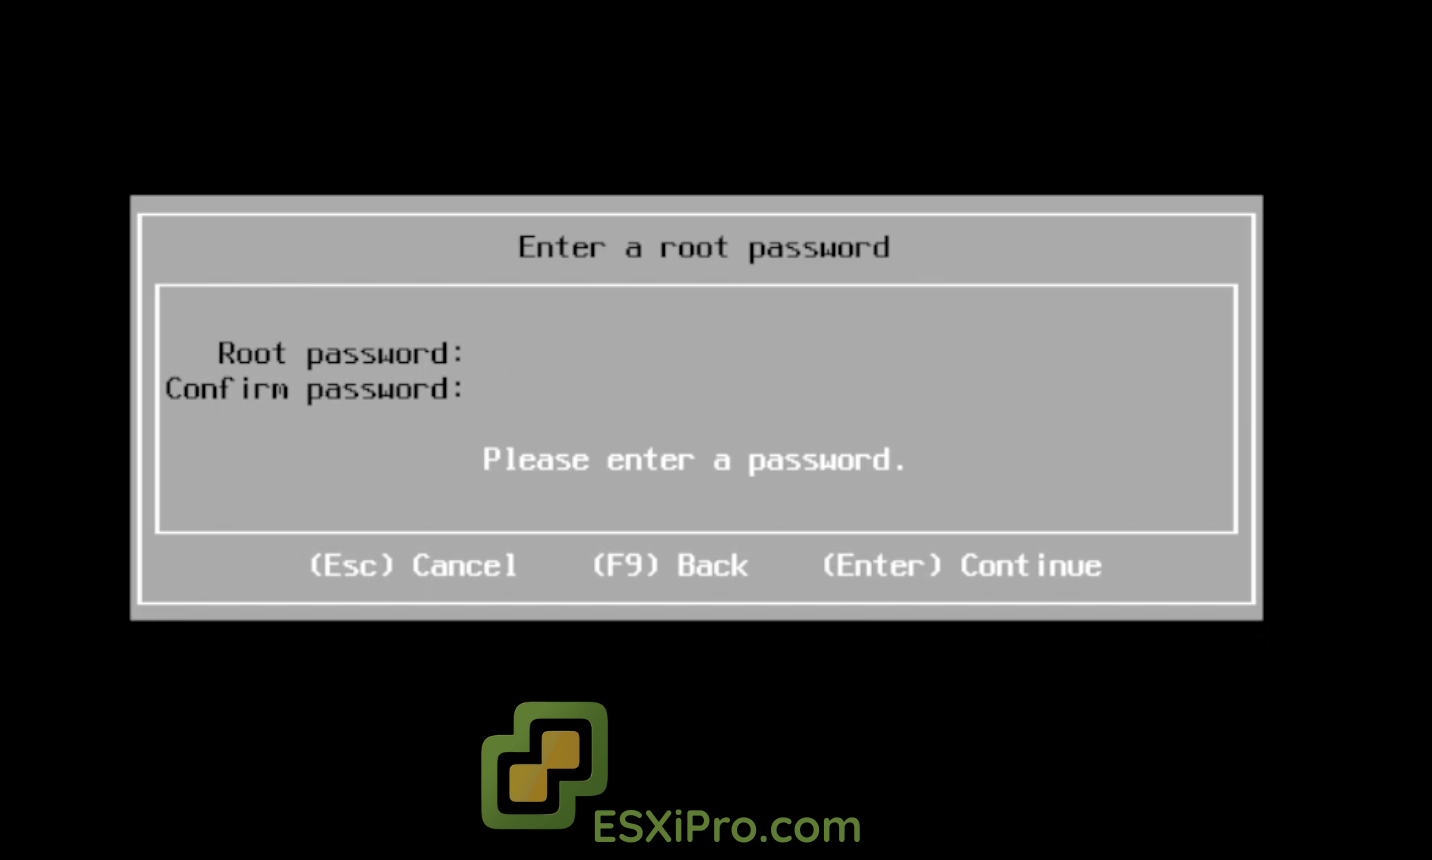
4Set Language and Password
Select your desired language. Now you must set a Root Password. This is the master password that you’ll use to log in and manage the ESXi host; that’s why you must make sure it’s secure.
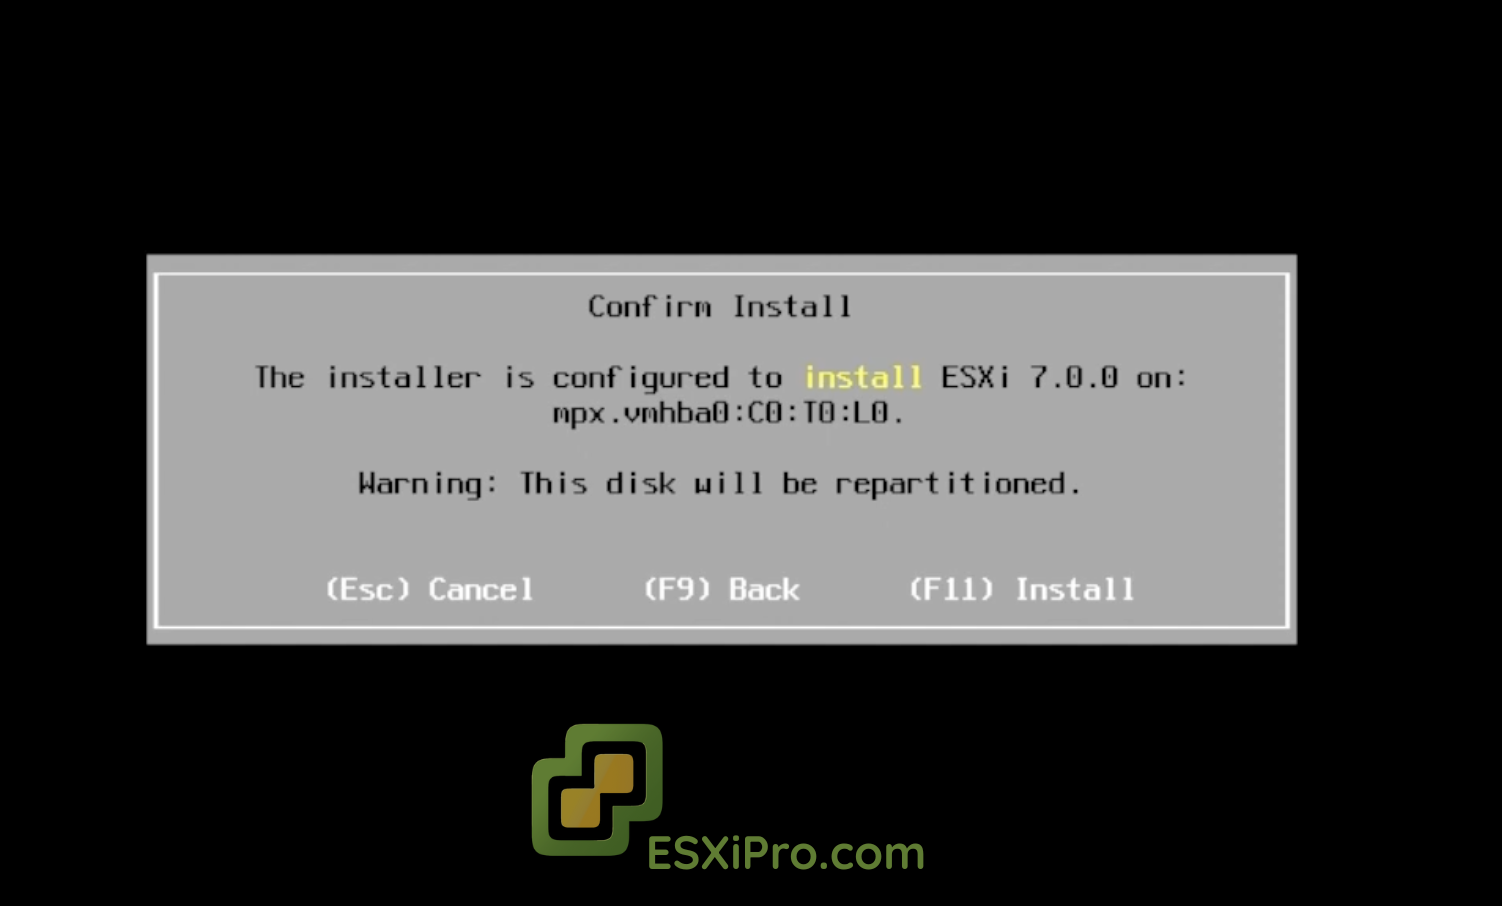
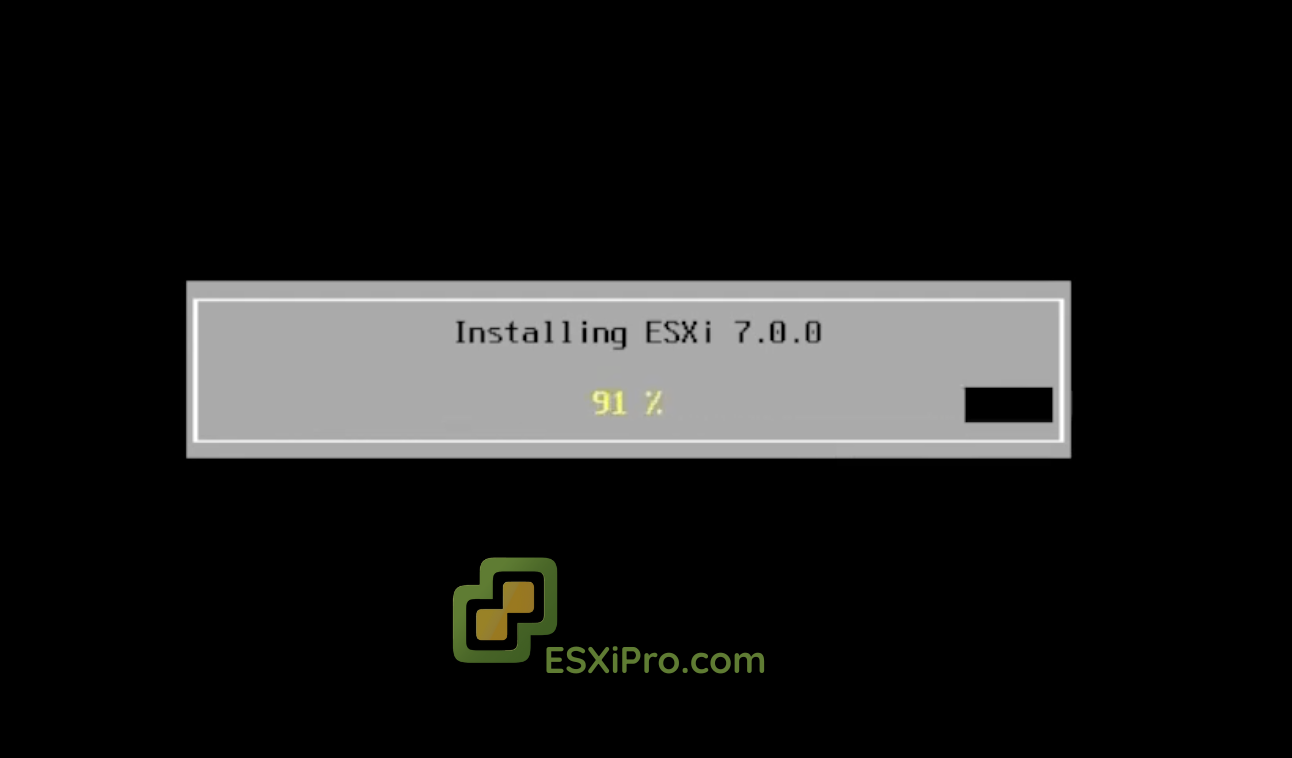
5Final Confirmation and Installation
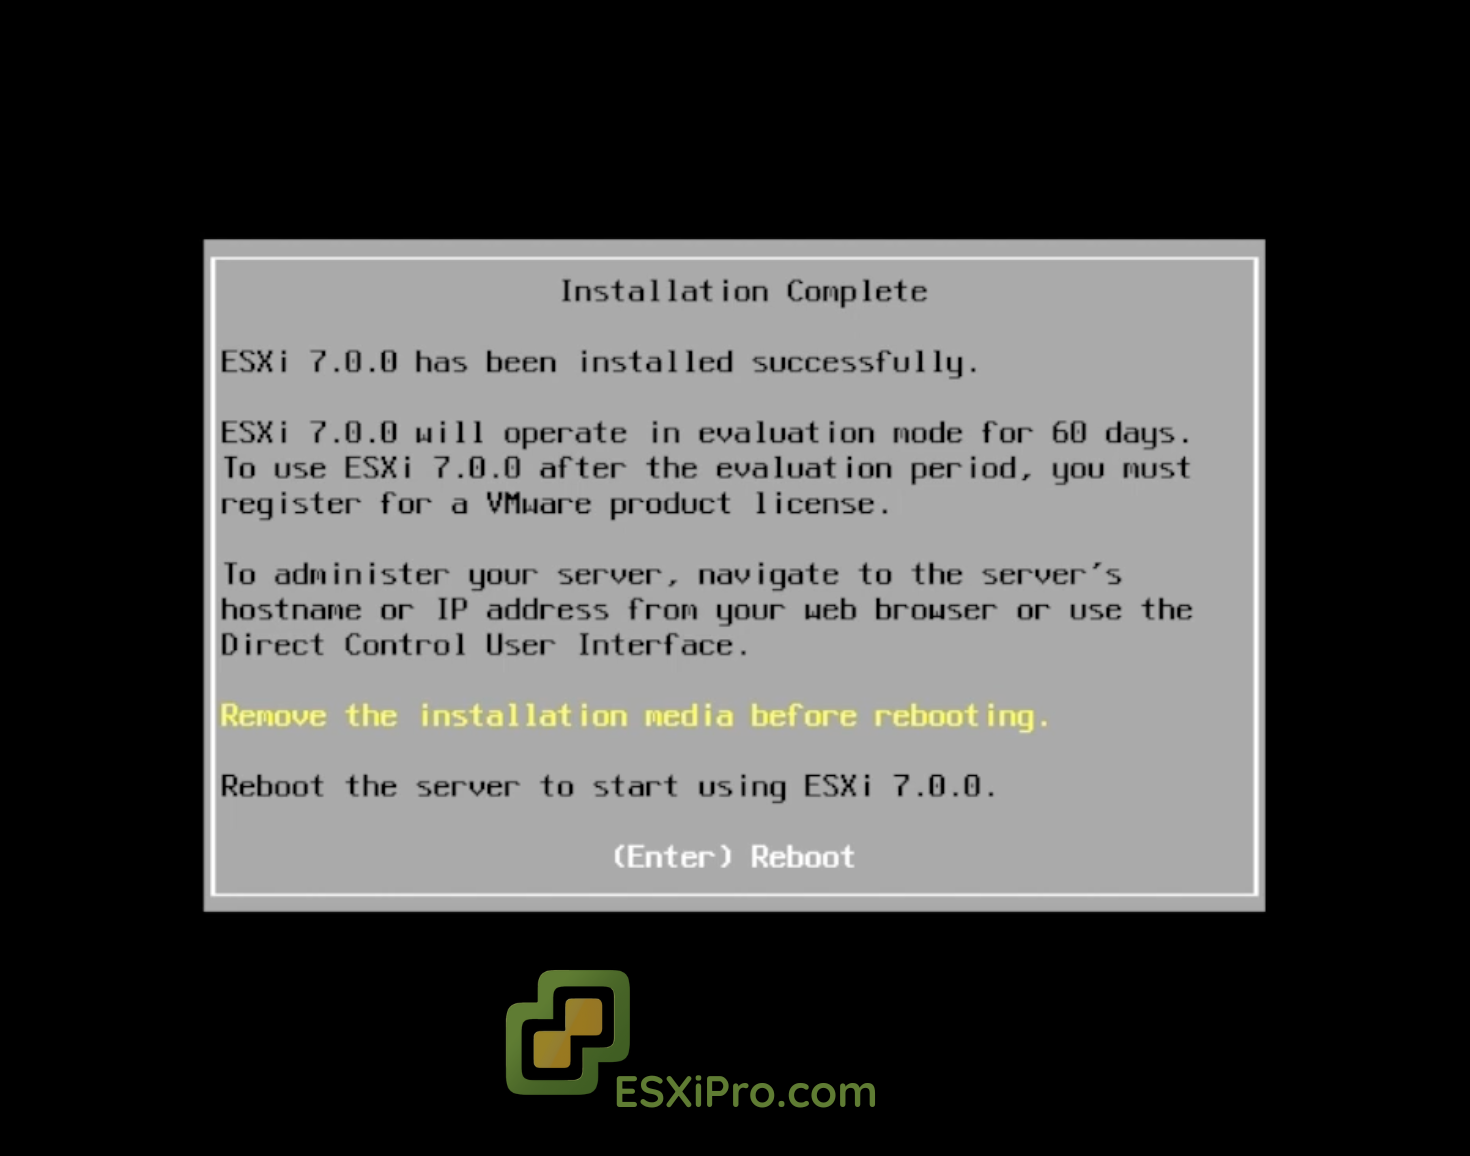
Confirm installation location and press F11 for the last time to start installation, then remove the installation media and reboot.
6Initial Configuration (Set a Static IP)
After rebooting, your ESXi host will display a yellow and black screen. It will have an automatically assigned IP address (DHCP) but you should set a static IP for better management.
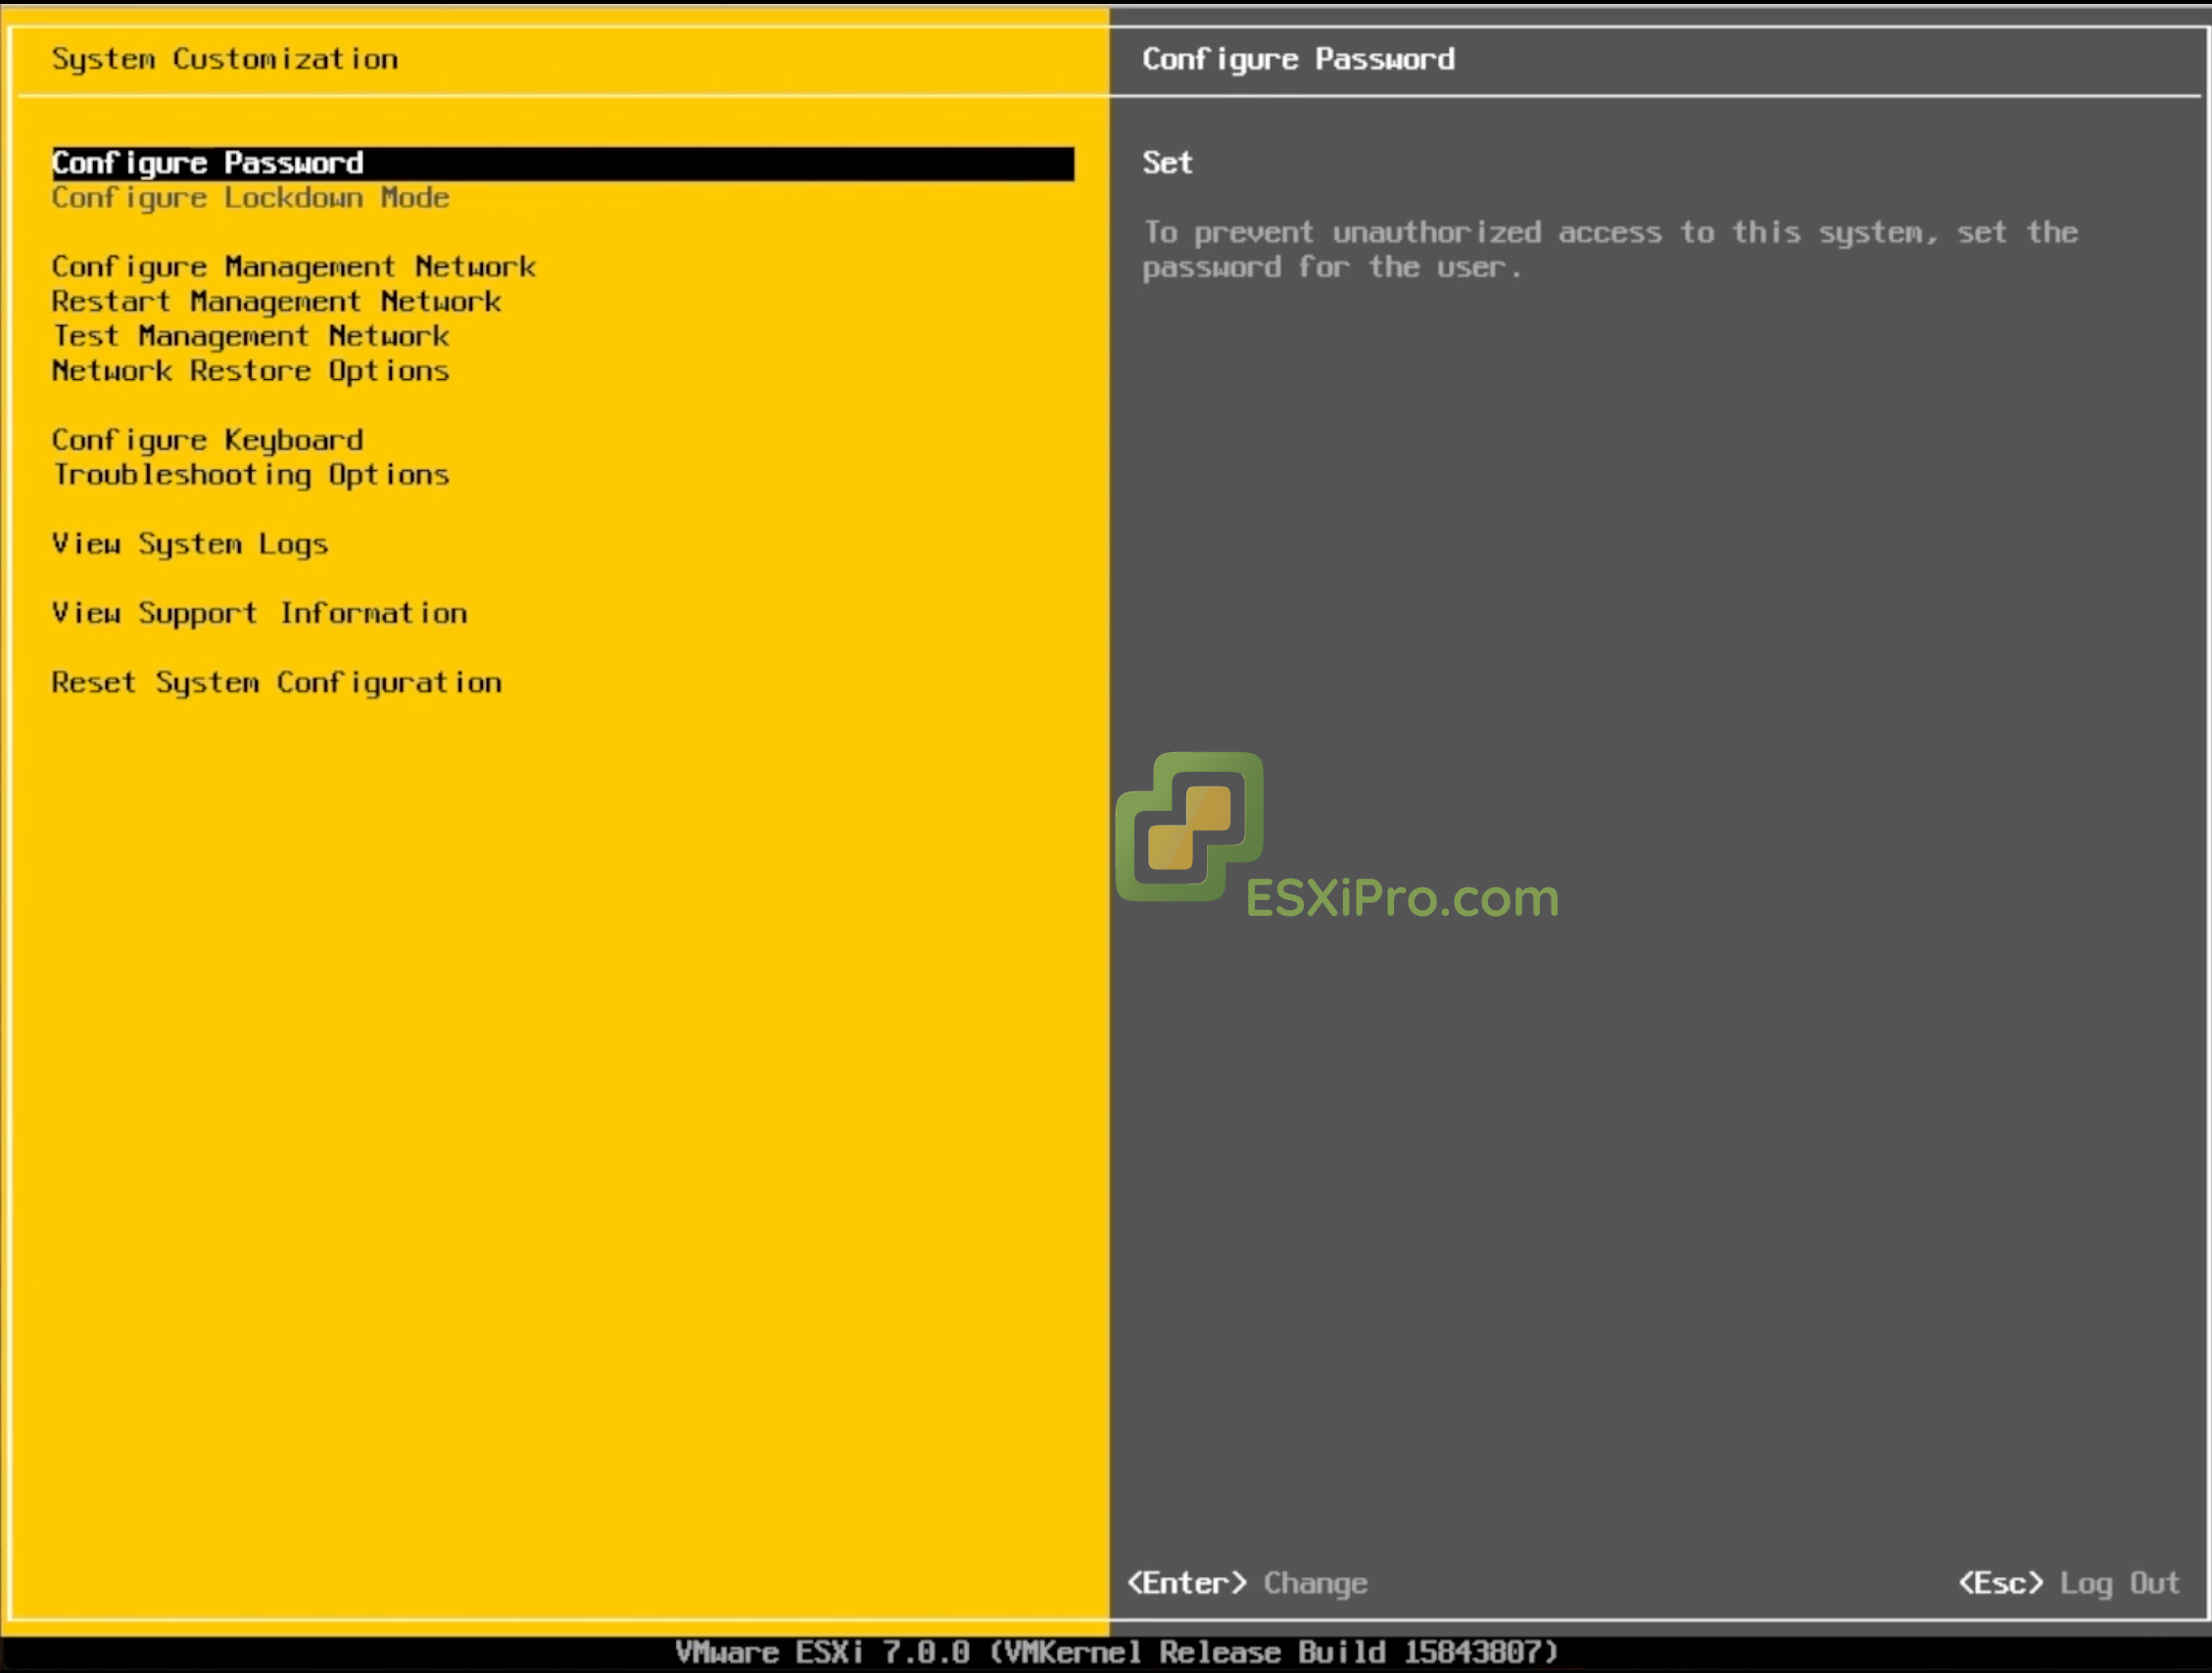
Access system settings: Press F2 on the main console screen to enter the system customization menu.
Log in: Enter the username root and the password you set during installation.
Configure Network: Scroll down to ‘Configure Management Network’ and press Enter.
Set Static IPv4: Select IPv4 Configuration. Now use the spacebar to change the settings from Use dynamic IPv4 to Set static IPv4 address and manually enter your static IP address accordingly to your desire, your subnet mask and default gateway.
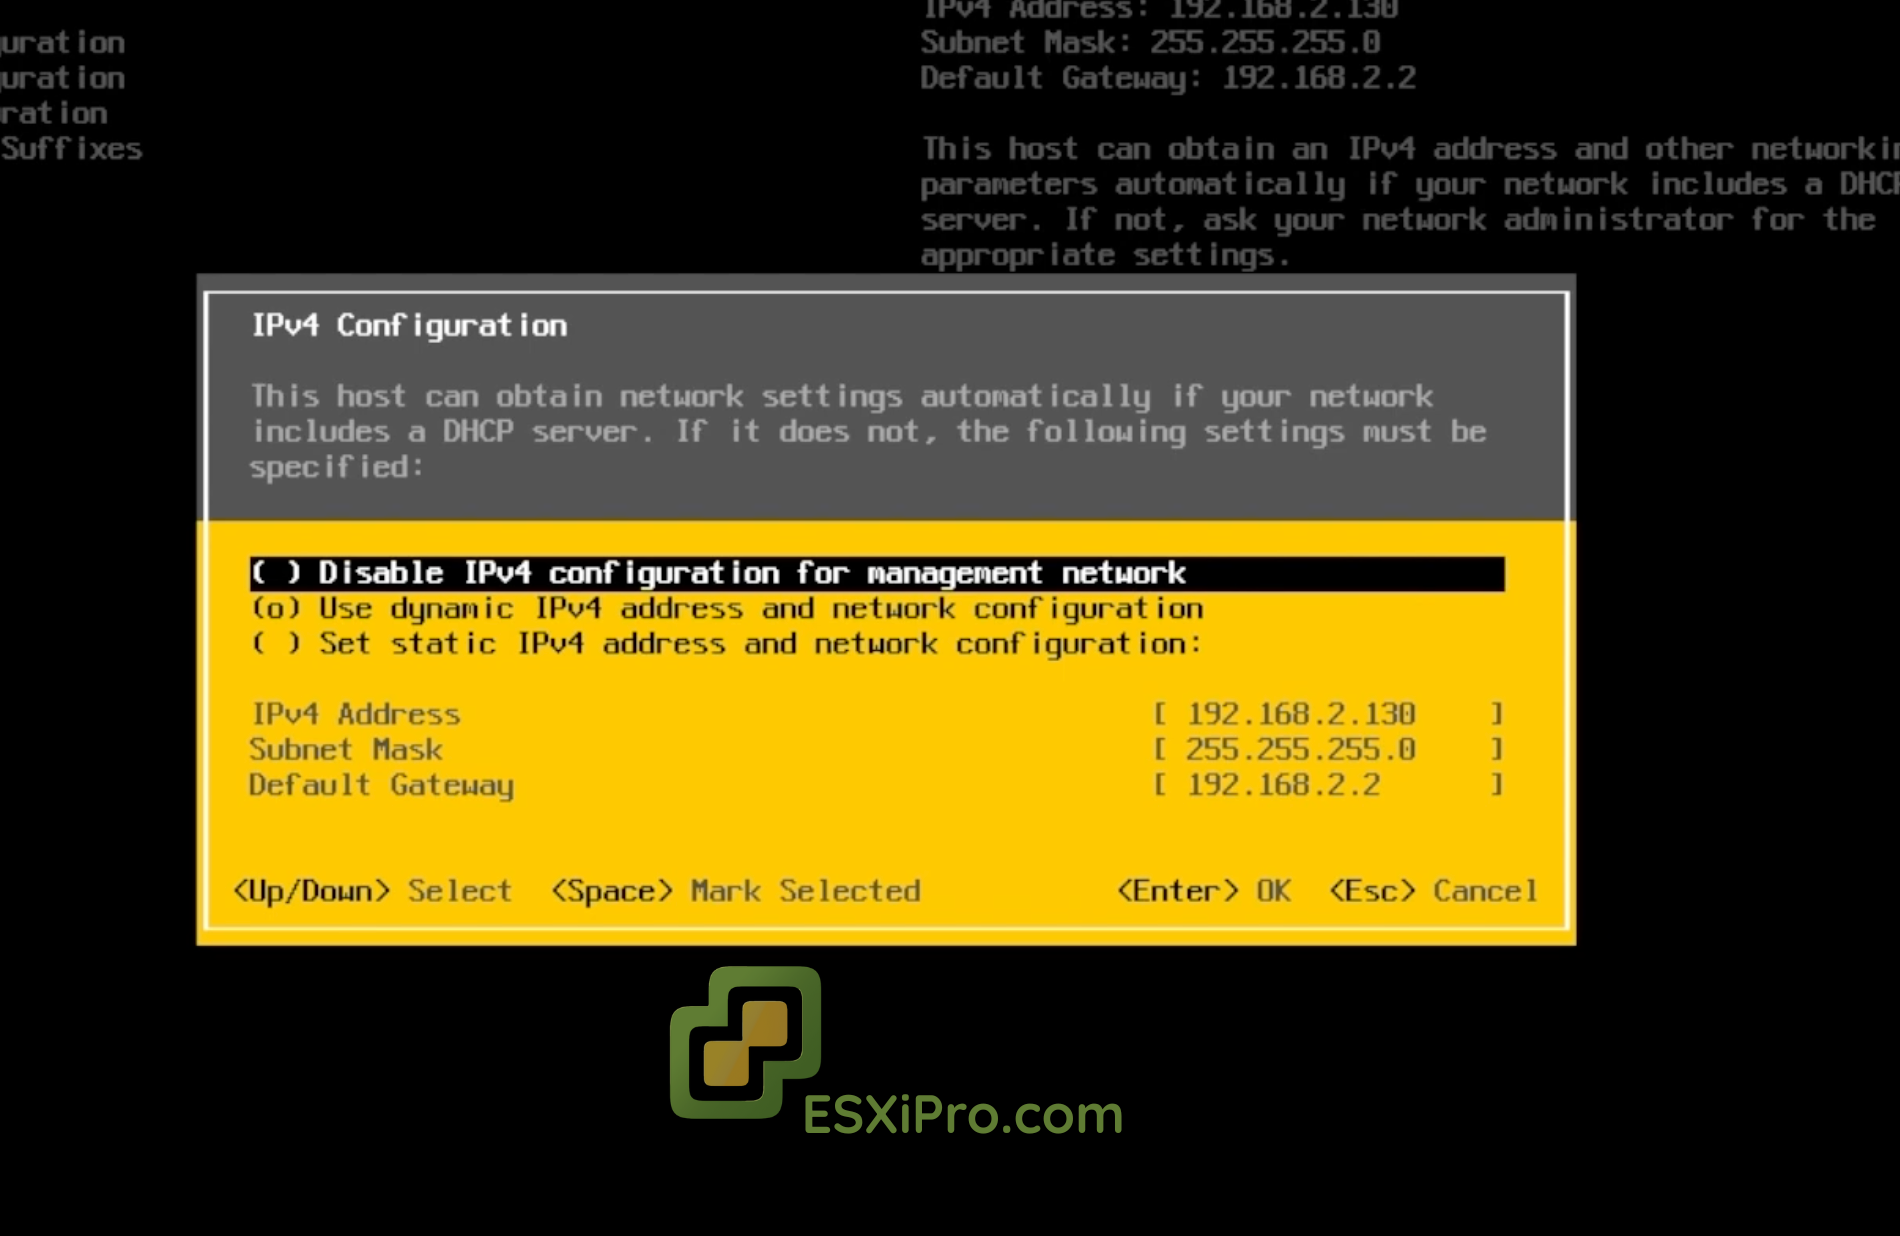
Apply Changes and Reboot: Press Escape to exit the configuration menus. Now, because you made network changes, you will be shown the prompt to reboot the host to apply the new IP settings, then select yes.
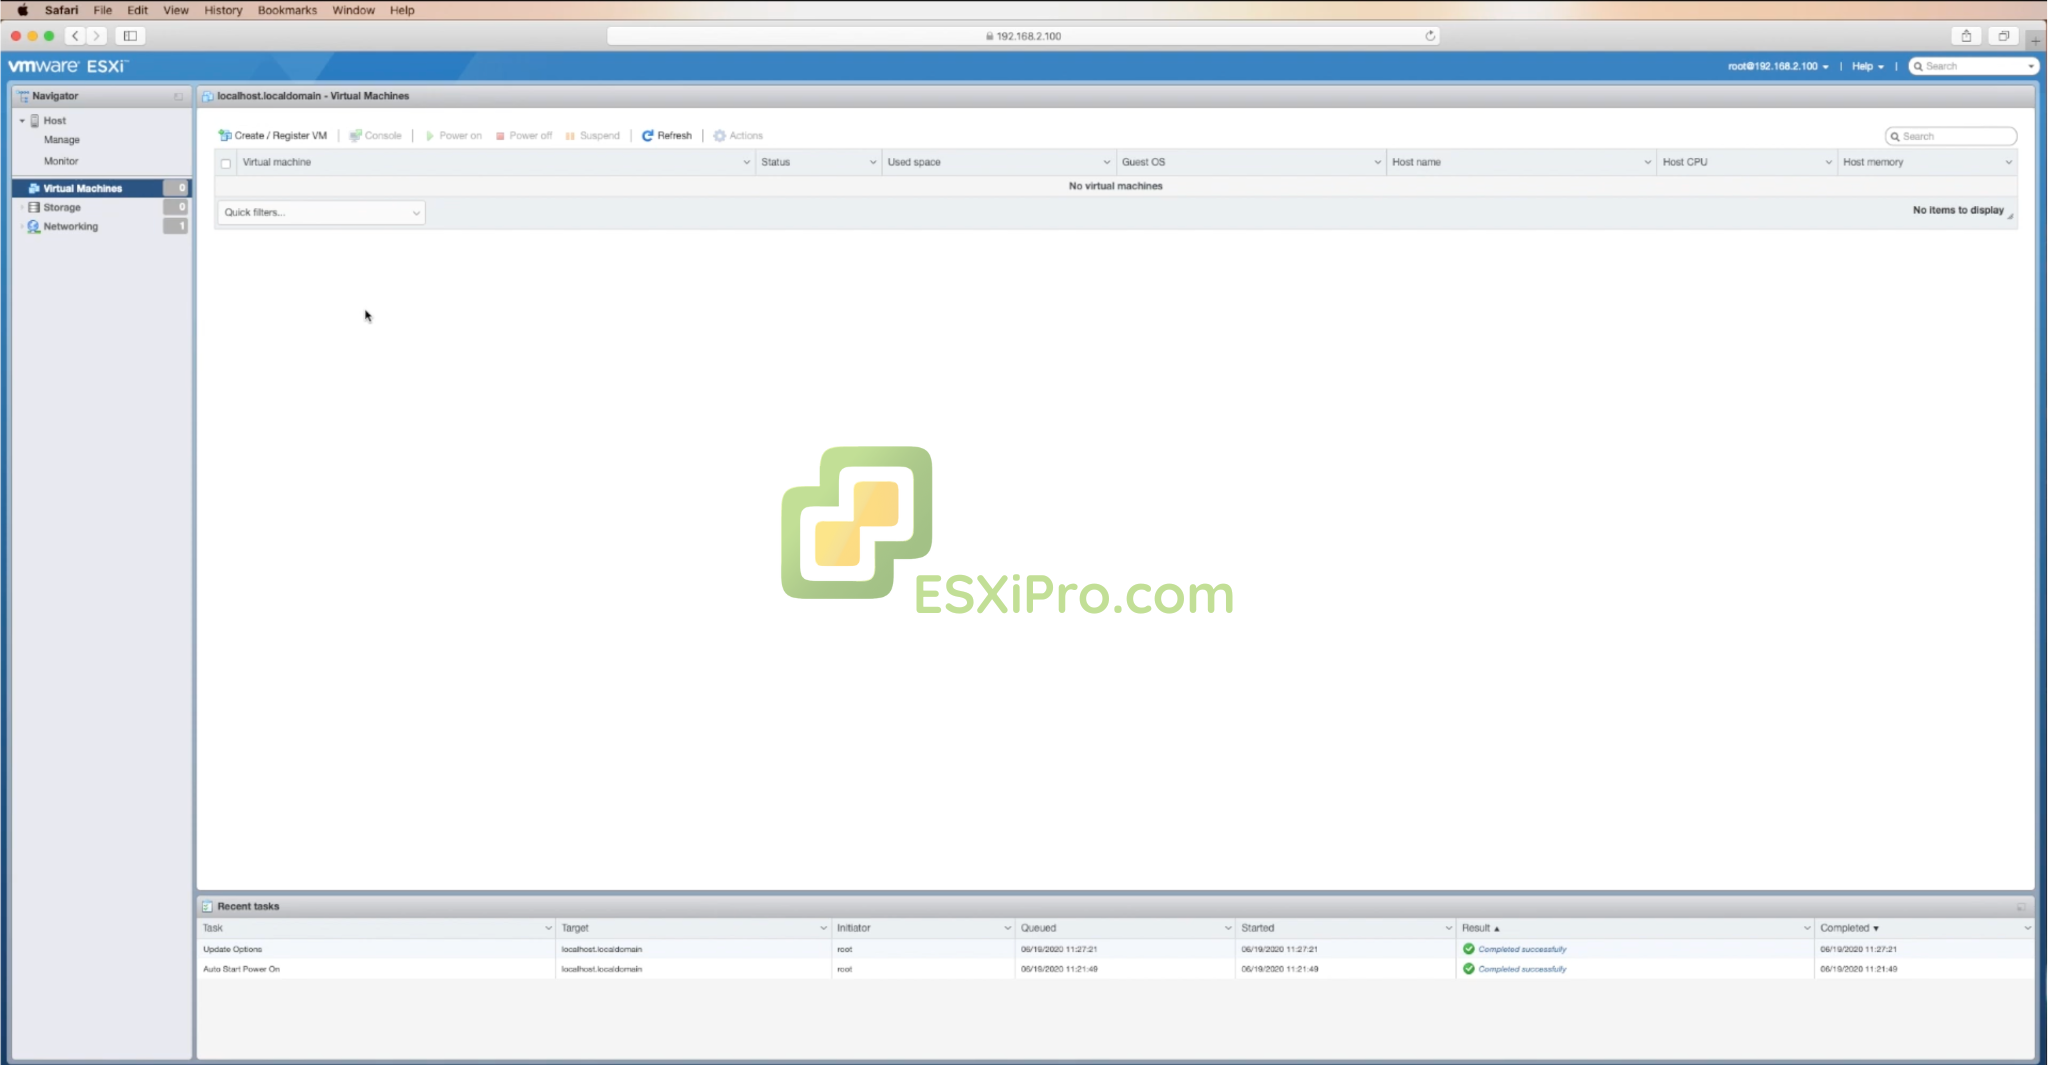
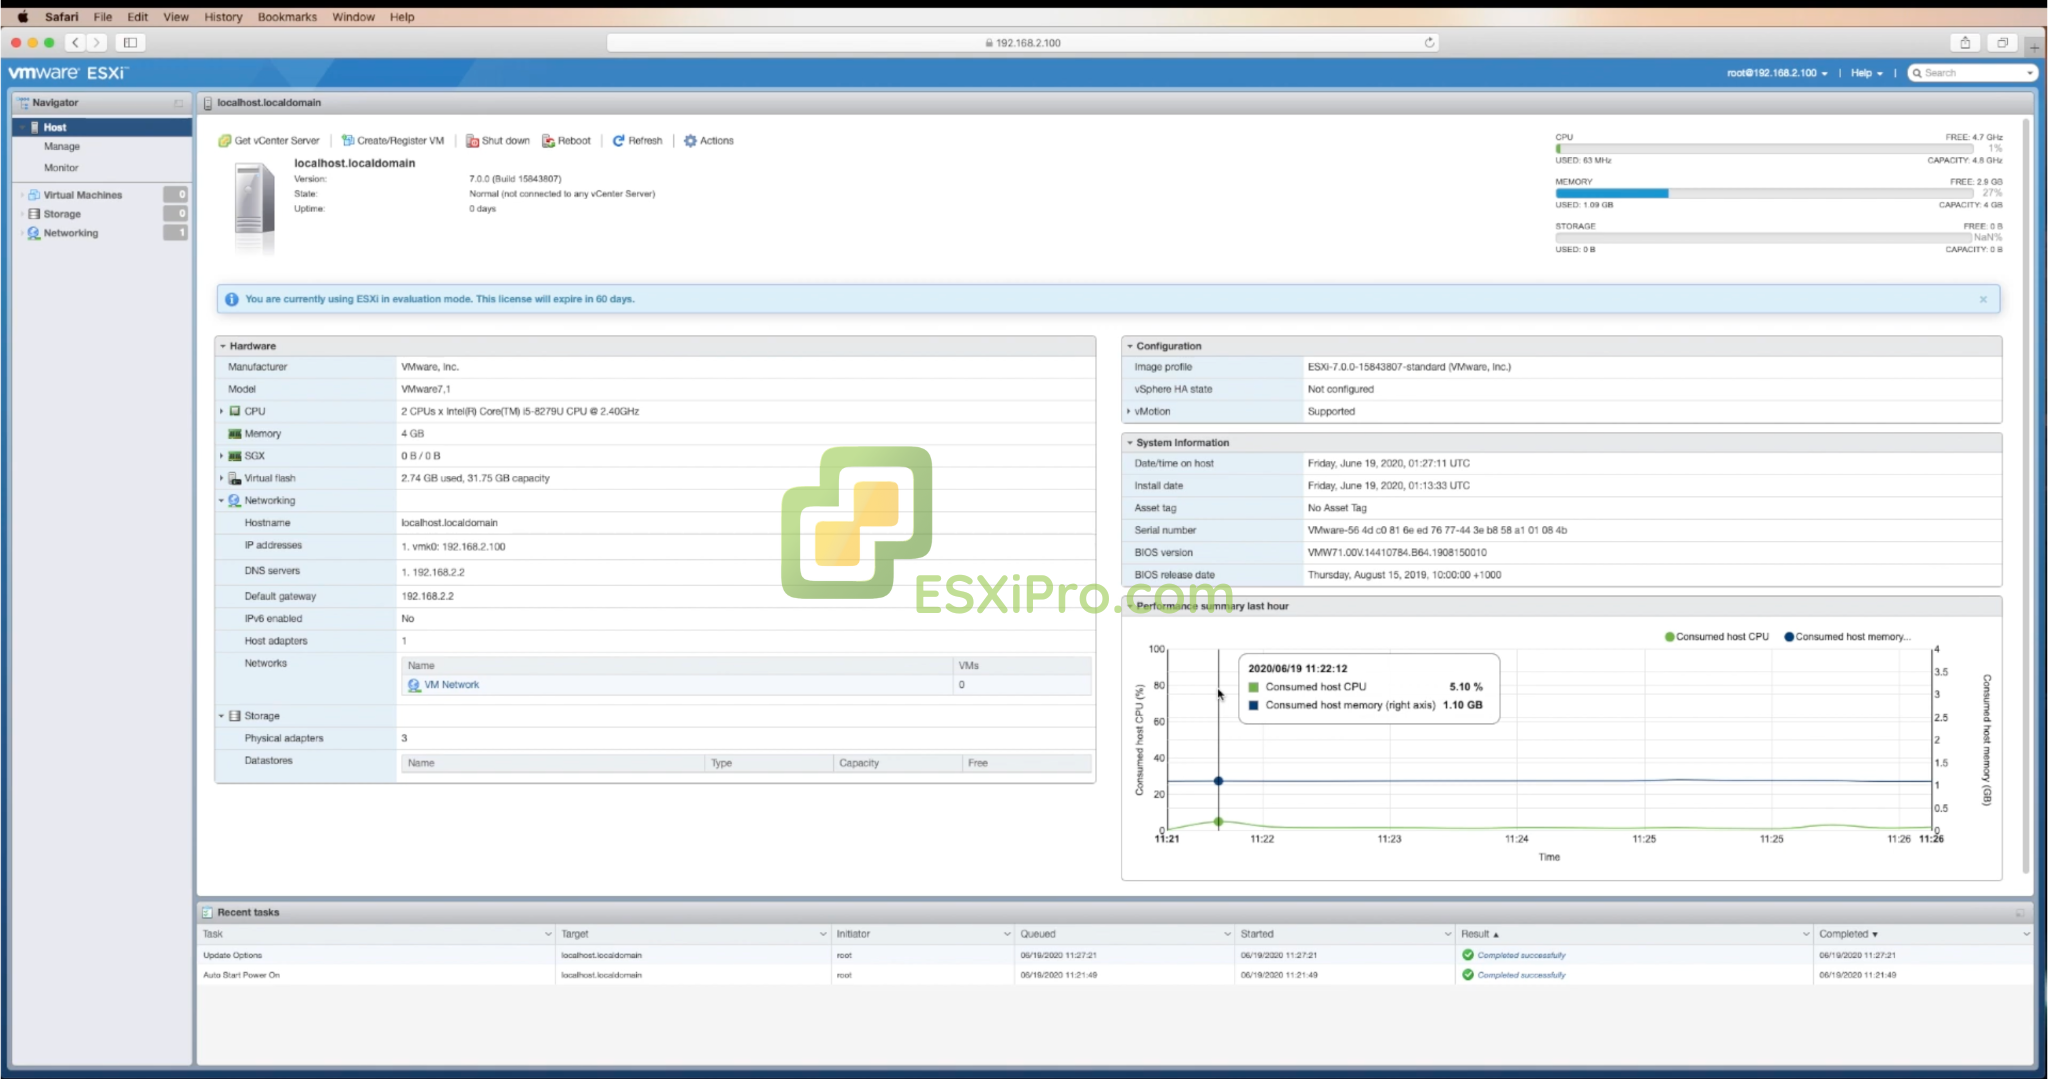
7Access the Web Interface
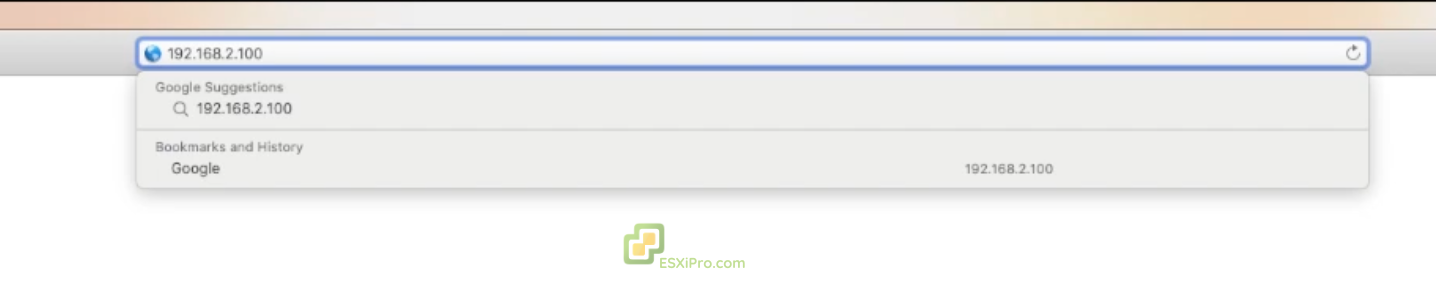
After the host reboots, you have to manage the ESXi host using a web browser from another computer on the same network.
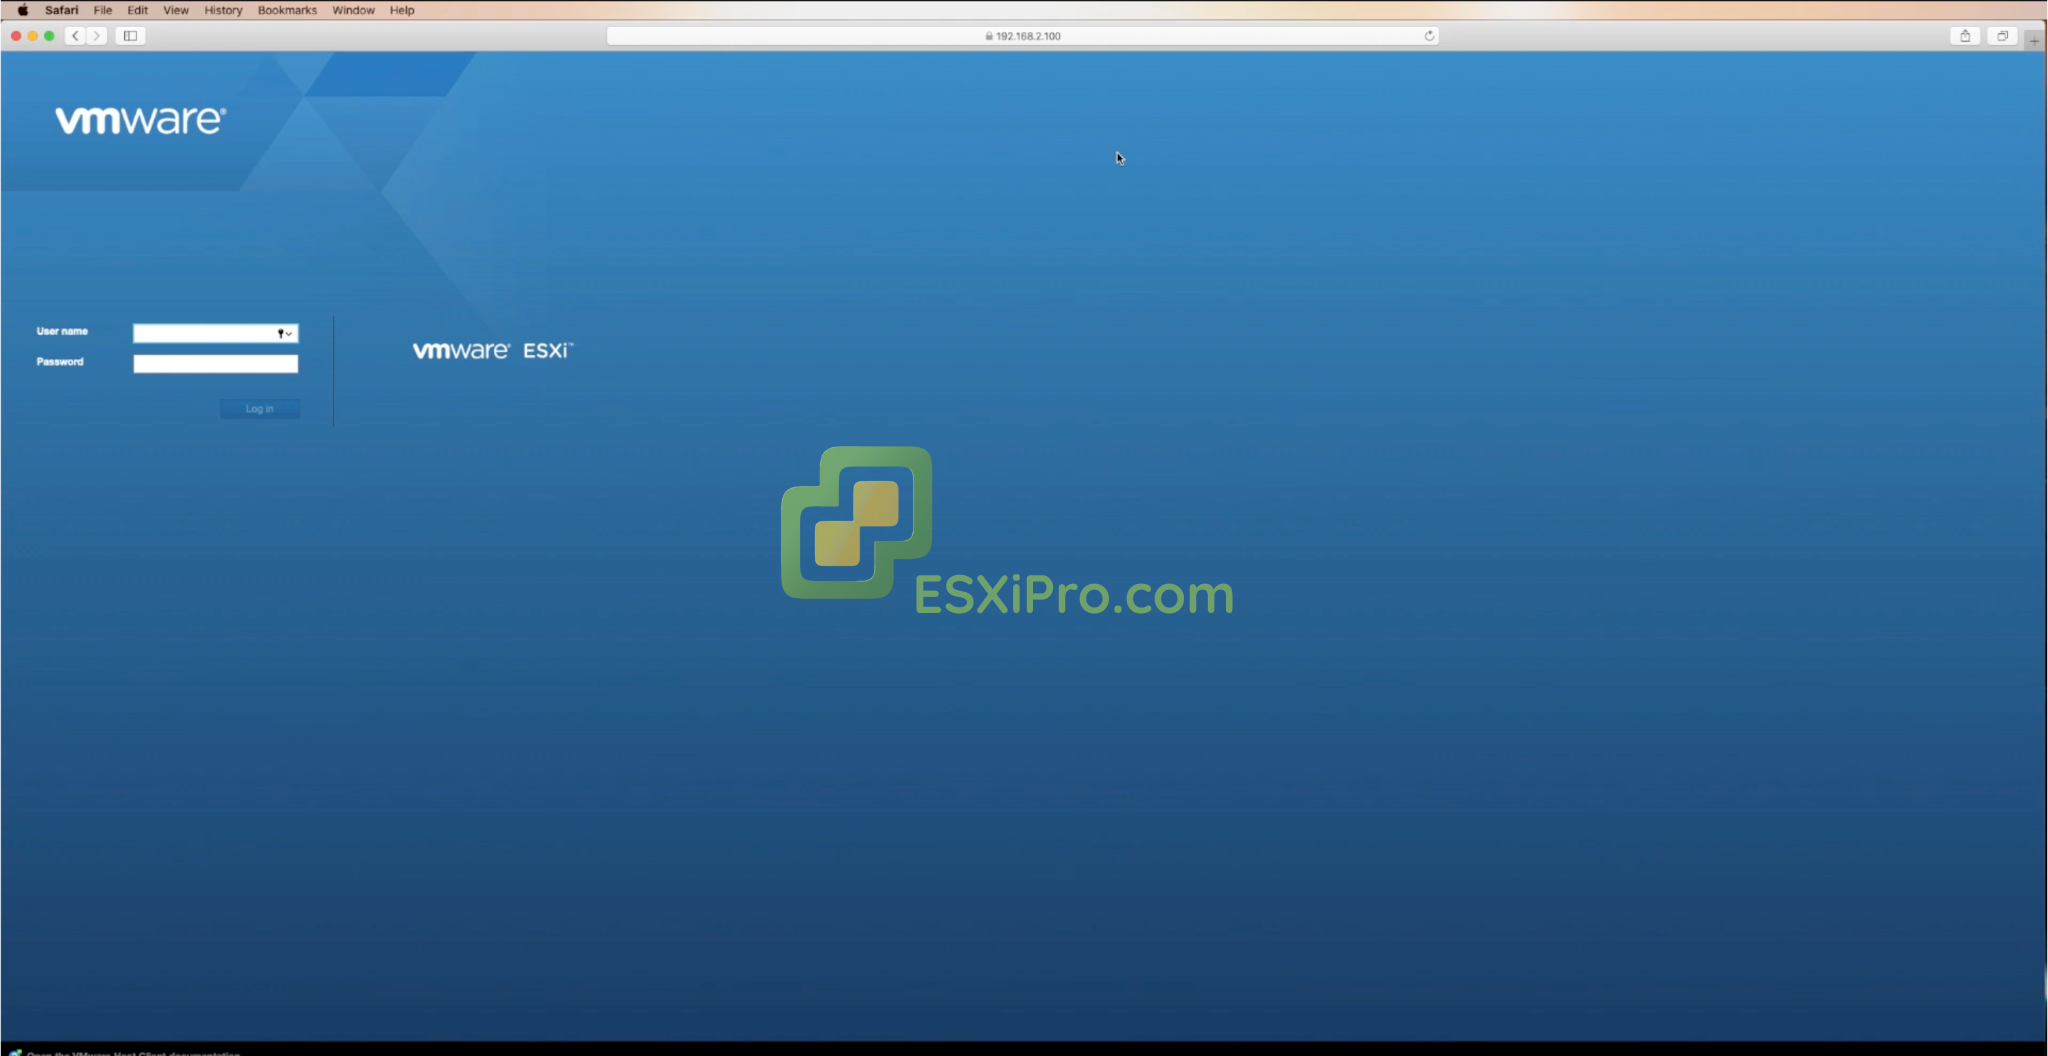
Navigate the Host: On a different computer, open your web browser and type the static IP address that you just configured into the address bar.
Log in: The browser might give you a security warning because it doesn’t have the SSL certificate, but you can still proceed to the site. You will then be presented with the login screen.
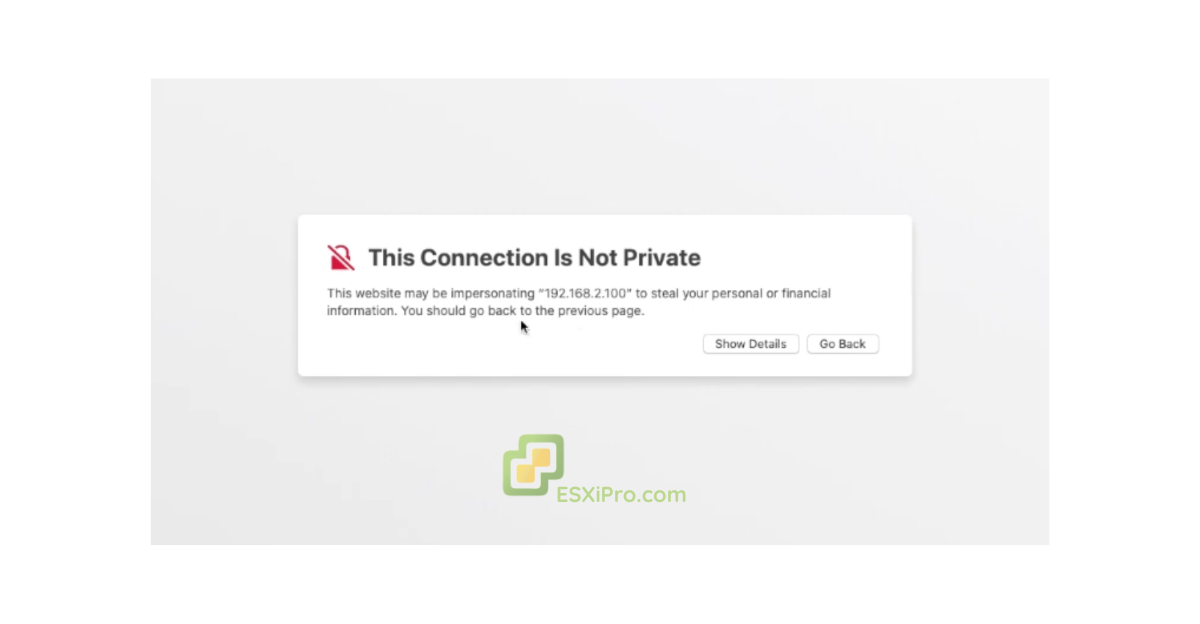
Manage: Log in using the root username and password. You now have access to the ESXi Host Client, a graphical interface where you can start building virtual machines, manage storage, and configure networking. The web interface is where you will do everything from building new VMs to managing the host’s performance.
ESXi Version History
From the first release in 2001 to the latest ESX 9.0, explore VMware’s journey of innovation in virtualization technology.
- VMware renamed ESXi back to ESX starting with version 9.0
- Memory Tiering allowing NVMe devices as tiered memory
- Device Selection Policies for enhanced vGPU allocation
- Virtual Hardware Version 22
- Fast-Suspend-Resume for vGPU VMs
- vSAN Global Deduplication
- DPU offloading to reduce CPU loads
- Enhanced CPU scheduler for high core count systems
- Mellanox driver supporting ConnectX-7 SmartNIC
- Live patching capabilities (tech preview)
- Improved security and performance
- Native Kubernetes integration (vSphere with Tanzu)
- Support for ARM hosts
- Virtual hardware version 17
- Improved security with Secure Boot, Identity Federation
- Minimum 32 GB disk requirement
- Quick Boot feature allowing reboot in under two minutes
- Persistent Memory (NVDIMM) device support
- Per-VM EVC capability
- Suspend and resume for vGPU workloads
- Single reboot upgrades
- Lifecycle Manager for centralized host management
- Distributed Services Engine for task offloading
- NVMe support for faster storage
- HTML5-based vSphere Client introduced
- Virtual Volumes for storage flexibility
- OpenStack integration
- Long Distance vMotion
- Support for up to 480 logical CPUs per host
- Early container support
- Network I/O Control 3
- Enhanced HA and DRS for clusters
- Boosted scalability
- vSphere Replication for disaster recovery
- Better VM density per host
- VAAI to offload storage tasks
- Storage DRS for automatic datastore balancing
- Refined vMotion operation
- ESX discontinued – ESXi only from this version forward
- Service Console removed for leaner design
- Boosted security and performance
- Last version of classic ESX released
- Marked shift to ESXi-only architecture going forward
- vSphere Distributed Switch for networking
- vSphere Data Protection for backups
- Streamlined patching through Update Manager
- Both ESX and ESXi versions available
- 64-bit host support
- Storage vMotion added
- vSphere HA for VM recovery
- ESXi edition introduced (smaller footprint)
- vMotion for live VM migration without downtime
- vCenter Server for centralized management
- Virtual Infrastructure 3 platform
- 64-bit guest support
- Enhanced storage management
- Improved resource allocation
- Performance improvements
- Expanded hardware support
- Better stability
- First release with basic VM support
- Handled Windows and Linux guests
- Foundation of VMware virtualization
Frequently Asked Questions
Everything you need to know about ESXi, from basic questions to technical support.
Basic Questions
Yes, ESXi is free again. Broadcom brought back a free version in 2025 (ESXi 8.0 Update 3e) after stopping it in 2024.
Yes. ESXi is made by VMware, which is now owned by Broadcom.
Yes. ESXi is a bare-metal hypervisor that runs directly on your server hardware.
Sort of. It’s a special operating system built only for running virtual machines. It’s not like Windows or Linux that you use for regular tasks.
No. The old ESX (versions 4.1 and earlier) used a Linux kernel, but ESXi doesn’t use Linux at all.
No. ESXi has its own kernel called vmkernel, not based on Linux.
It’s software that lets you run multiple virtual computers on one physical server.
The physical server running ESXi software.
Same as ESXi host – the physical machine with ESXi installed.
ESXi 8.0 Update 3g (released July 2025) is the latest for version 8. ESX 9.0 (released June 2025) is the newest major version.
It’s the main software that creates and manages virtual machines on a physical server.
A command-line tool to manage ESXi directly from the server.
ESXi stands for “ESX integrated”.
VM means Virtual Machine – the virtual computers that run on ESXi.
A web browser tool to manage your ESXi server without needing vCenter.
How-To Questions
Use recovery mode or reinstall ESXi if you can’t recover it.
Use vSphere Lifecycle Manager or download the upgrade file and install it through command line.
Download patches from Broadcom and apply them using vSphere Update Manager or command line.
Go to Broadcom support portal, create a free account, navigate to VMware vSphere Hypervisor section, and download the version you need.
Right-click the VM in the host client and select “Clone” or use vCenter for more options.
Download the patch bundle and apply it using command line or vSphere Lifecycle Manager.
Log into Broadcom support portal, go to VMware vSphere Hypervisor, select version 8.0U3e, and download the ISO.
End of Life Questions
October 2, 2025 – General Support ends on this date.
October 11, 2027 for General Support.
Same as above – October 2, 2025.
October 15, 2022 for General Support (already ended).
October 15, 2022 for General Support (already ended).
October 2, 2025 – after this, no more updates or patches.